Kong’s official documentation is already fairly detailed, and readers should consult it first. This post is mainly a personal record, essentially a memo, so it may be missing a lot of detail.
First, there are many ways to deploy Kong Gateway. This post uses the simplest one: deploying the containers manually with Docker.
Network
docker network create kong-networkDatabase
Here we deploy a local Postgres container.
docker volume create kong-database-volume

docker run -d \
    --name kong-database \
    --network kong-network \
    -p 5432:5432 \
    -e "POSTGRES_USER=kong" \
    -e "POSTGRES_DB=kong" \
    -e "POSTGRES_PASSWORD=kongpass" \
    -v kong-database-volume:/var/lib/postgresql/data \
    postgres:16
Run the database migrations:
docker run --rm --network kong-network \
    -e "KONG_DATABASE=postgres" \
    -e "KONG_PG_HOST=kong-database" \
    -e "KONG_PG_PASSWORD=kongpass" \
    kong/kong:3.9.1 kong migrations bootstrap
Kong Gateway
docker run -d \
    --name kong-gateway \
    --network kong-network \
    -e "KONG_DATABASE=postgres" \
    -e "KONG_PG_HOST=kong-database" \
    -e "KONG_PG_USER=kong" \
    -e "KONG_PG_PASSWORD=kongpass" \
    -e "KONG_PROXY_ACCESS_LOG=/dev/stdout" \
    -e "KONG_ADMIN_ACCESS_LOG=/dev/stdout" \
    -e "KONG_PROXY_ERROR_LOG=/dev/stderr" \
    -e "KONG_ADMIN_ERROR_LOG=/dev/stderr" \
    -e "KONG_ADMIN_LISTEN=0.0.0.0:8001" \
    -e "KONG_ADMIN_GUI_PATH=/manager" \
    -e "KONG_ADMIN_GUI_URL=http://yourdomain.com:8002/manager" \
    -p 80:8000 \
    -p 443:8443 \
    -p 8001:8001 \
    -p 8002:8002 \
    kong/kong:3.9.1
Note: the following environment variables are set so that Kong Manager can be reached through a public domain:
- KONG_ADMIN_GUI_PATH=/manager
- KONG_ADMIN_GUI_URL=http://yourdomain.com:8002/manager
Since we’ve configured a domain, we inevitably have to deal with the SSL certificate. Kong ships with the ACME plugin, which can issue a certificate for our own domain and refresh it automatically.
Open http://yourdomain.com:8002/manager in a browser to reach the Kong Manager UI and configure Kong from there. As shown below:
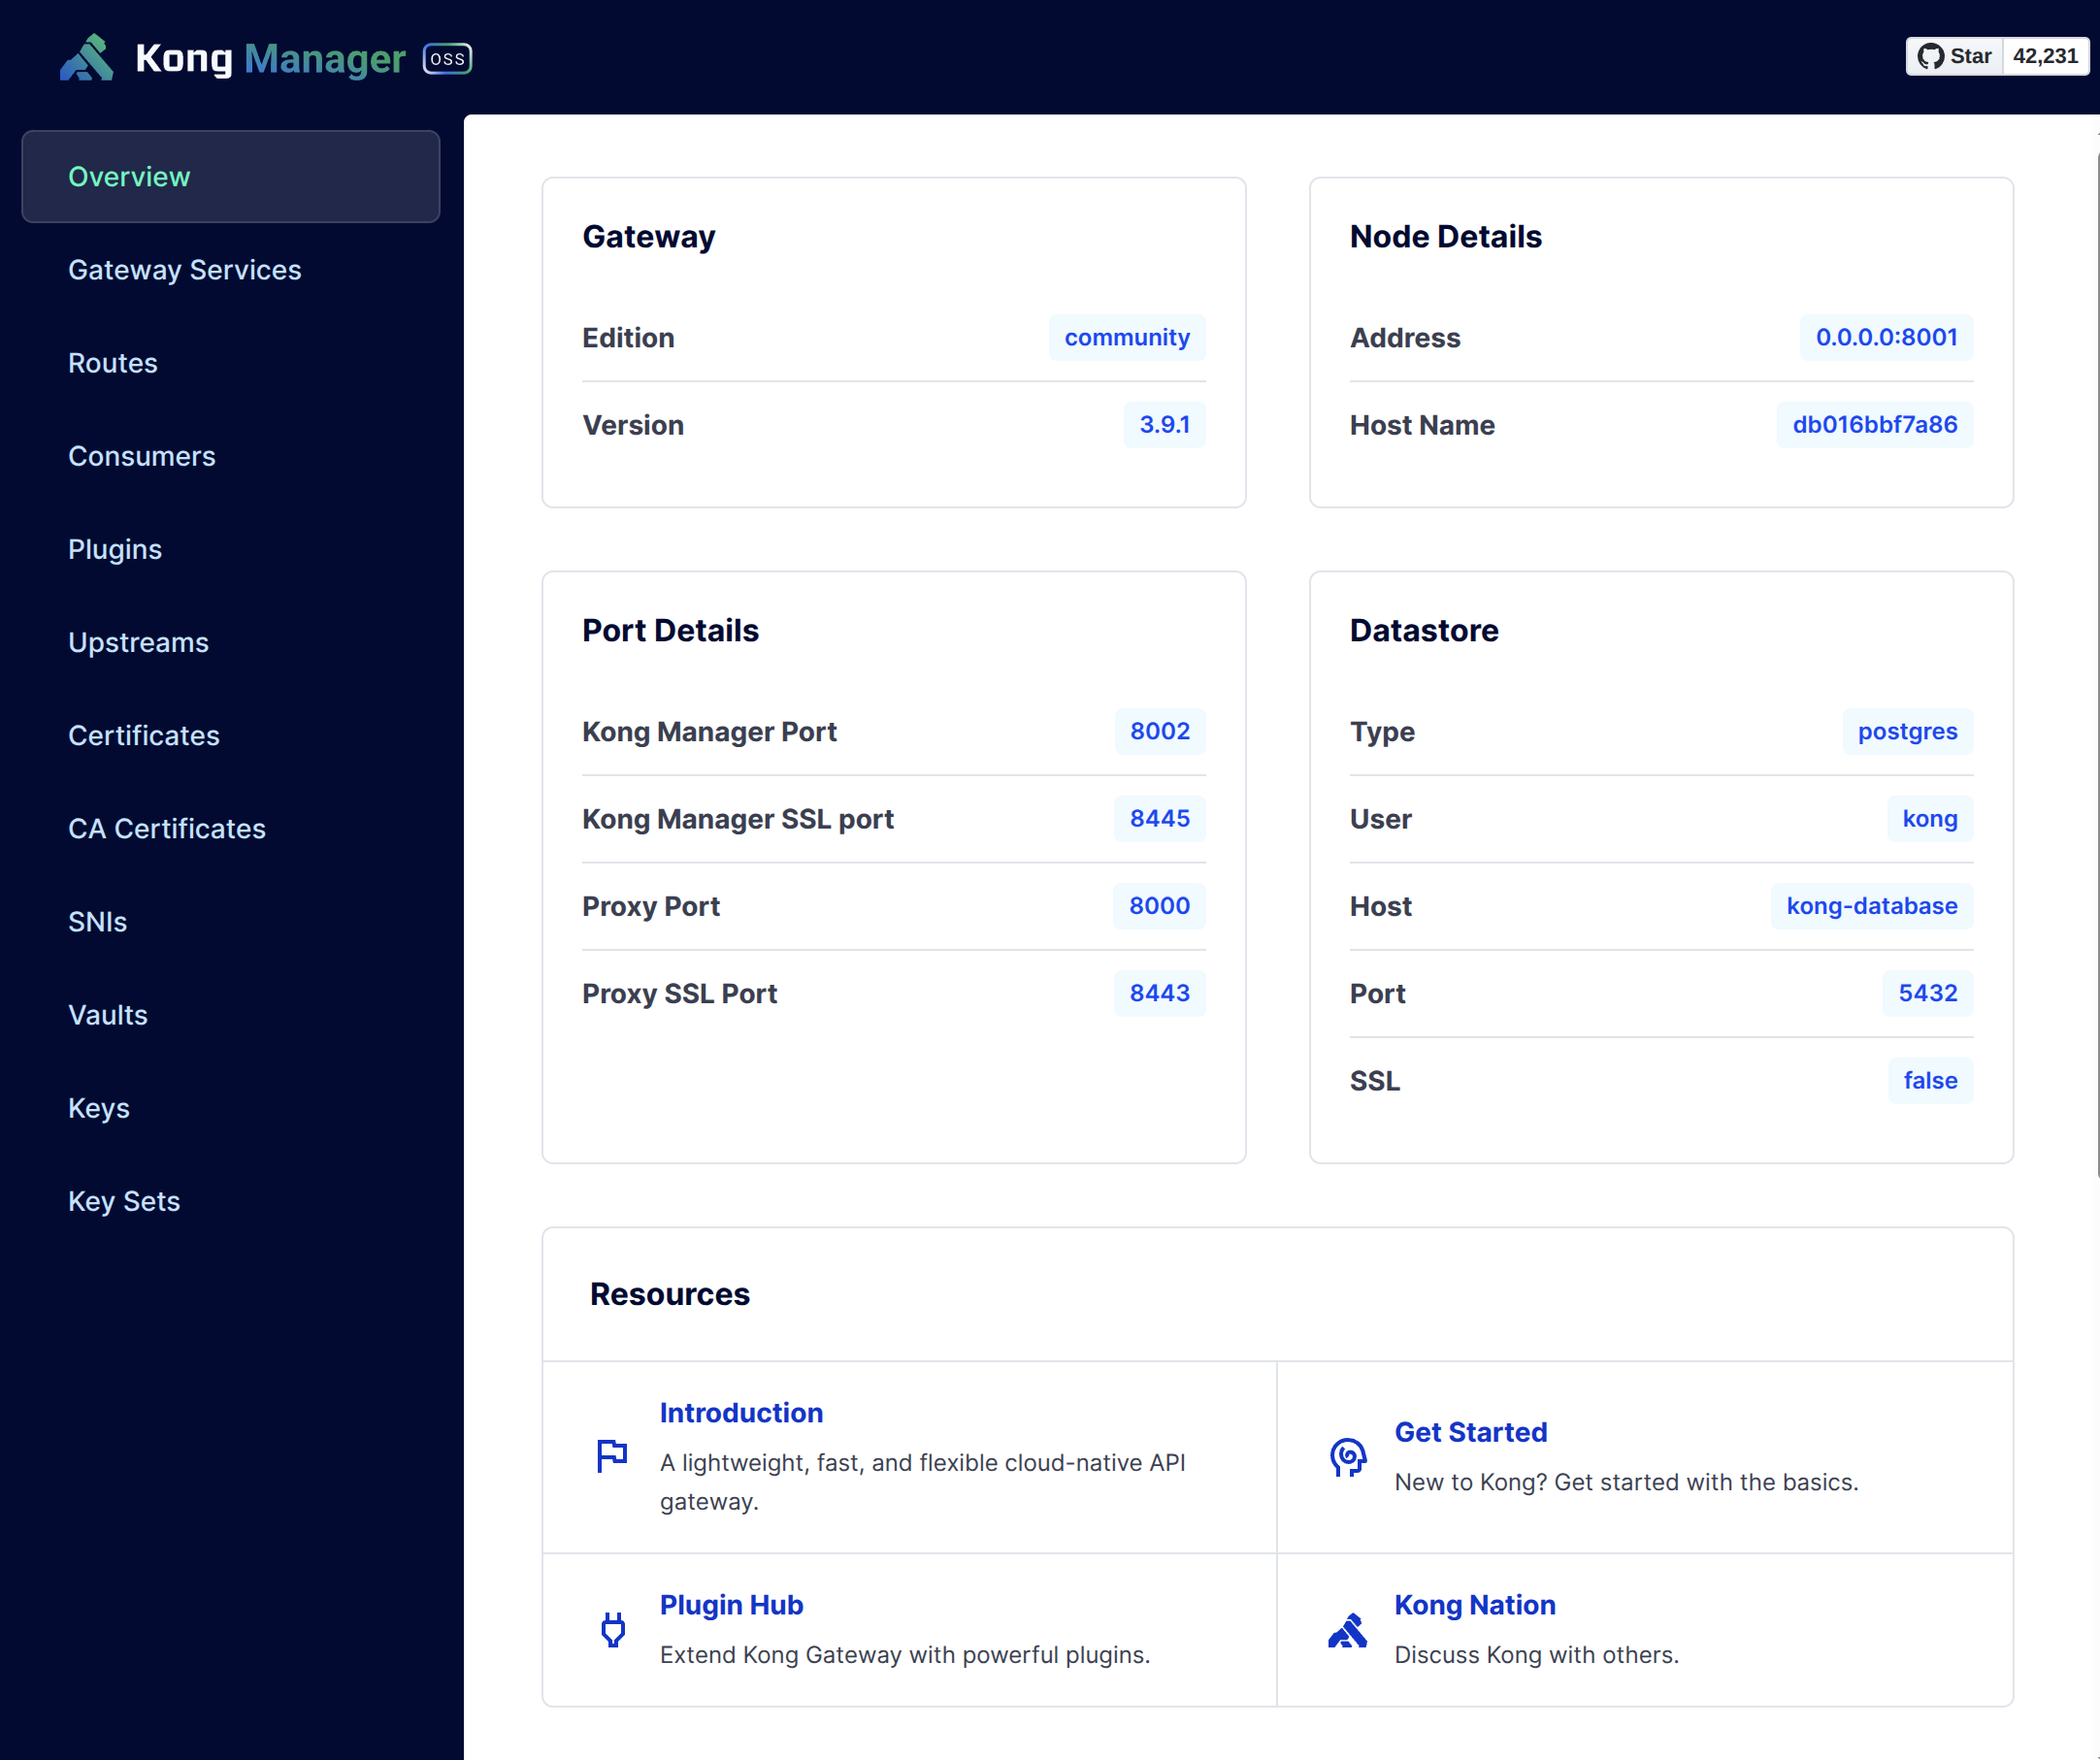
ACME Plugin
Issuing a certificate for the domain with the ACME plugin involves three main steps:
- Create an acme-service: a dummy service that handles the ACME Challenge and related work.
- Create an acme-route attached to the acme-service above.
- Create an acme-plugin. It is global, and this plugin implements the core ACME functionality.
acme-service
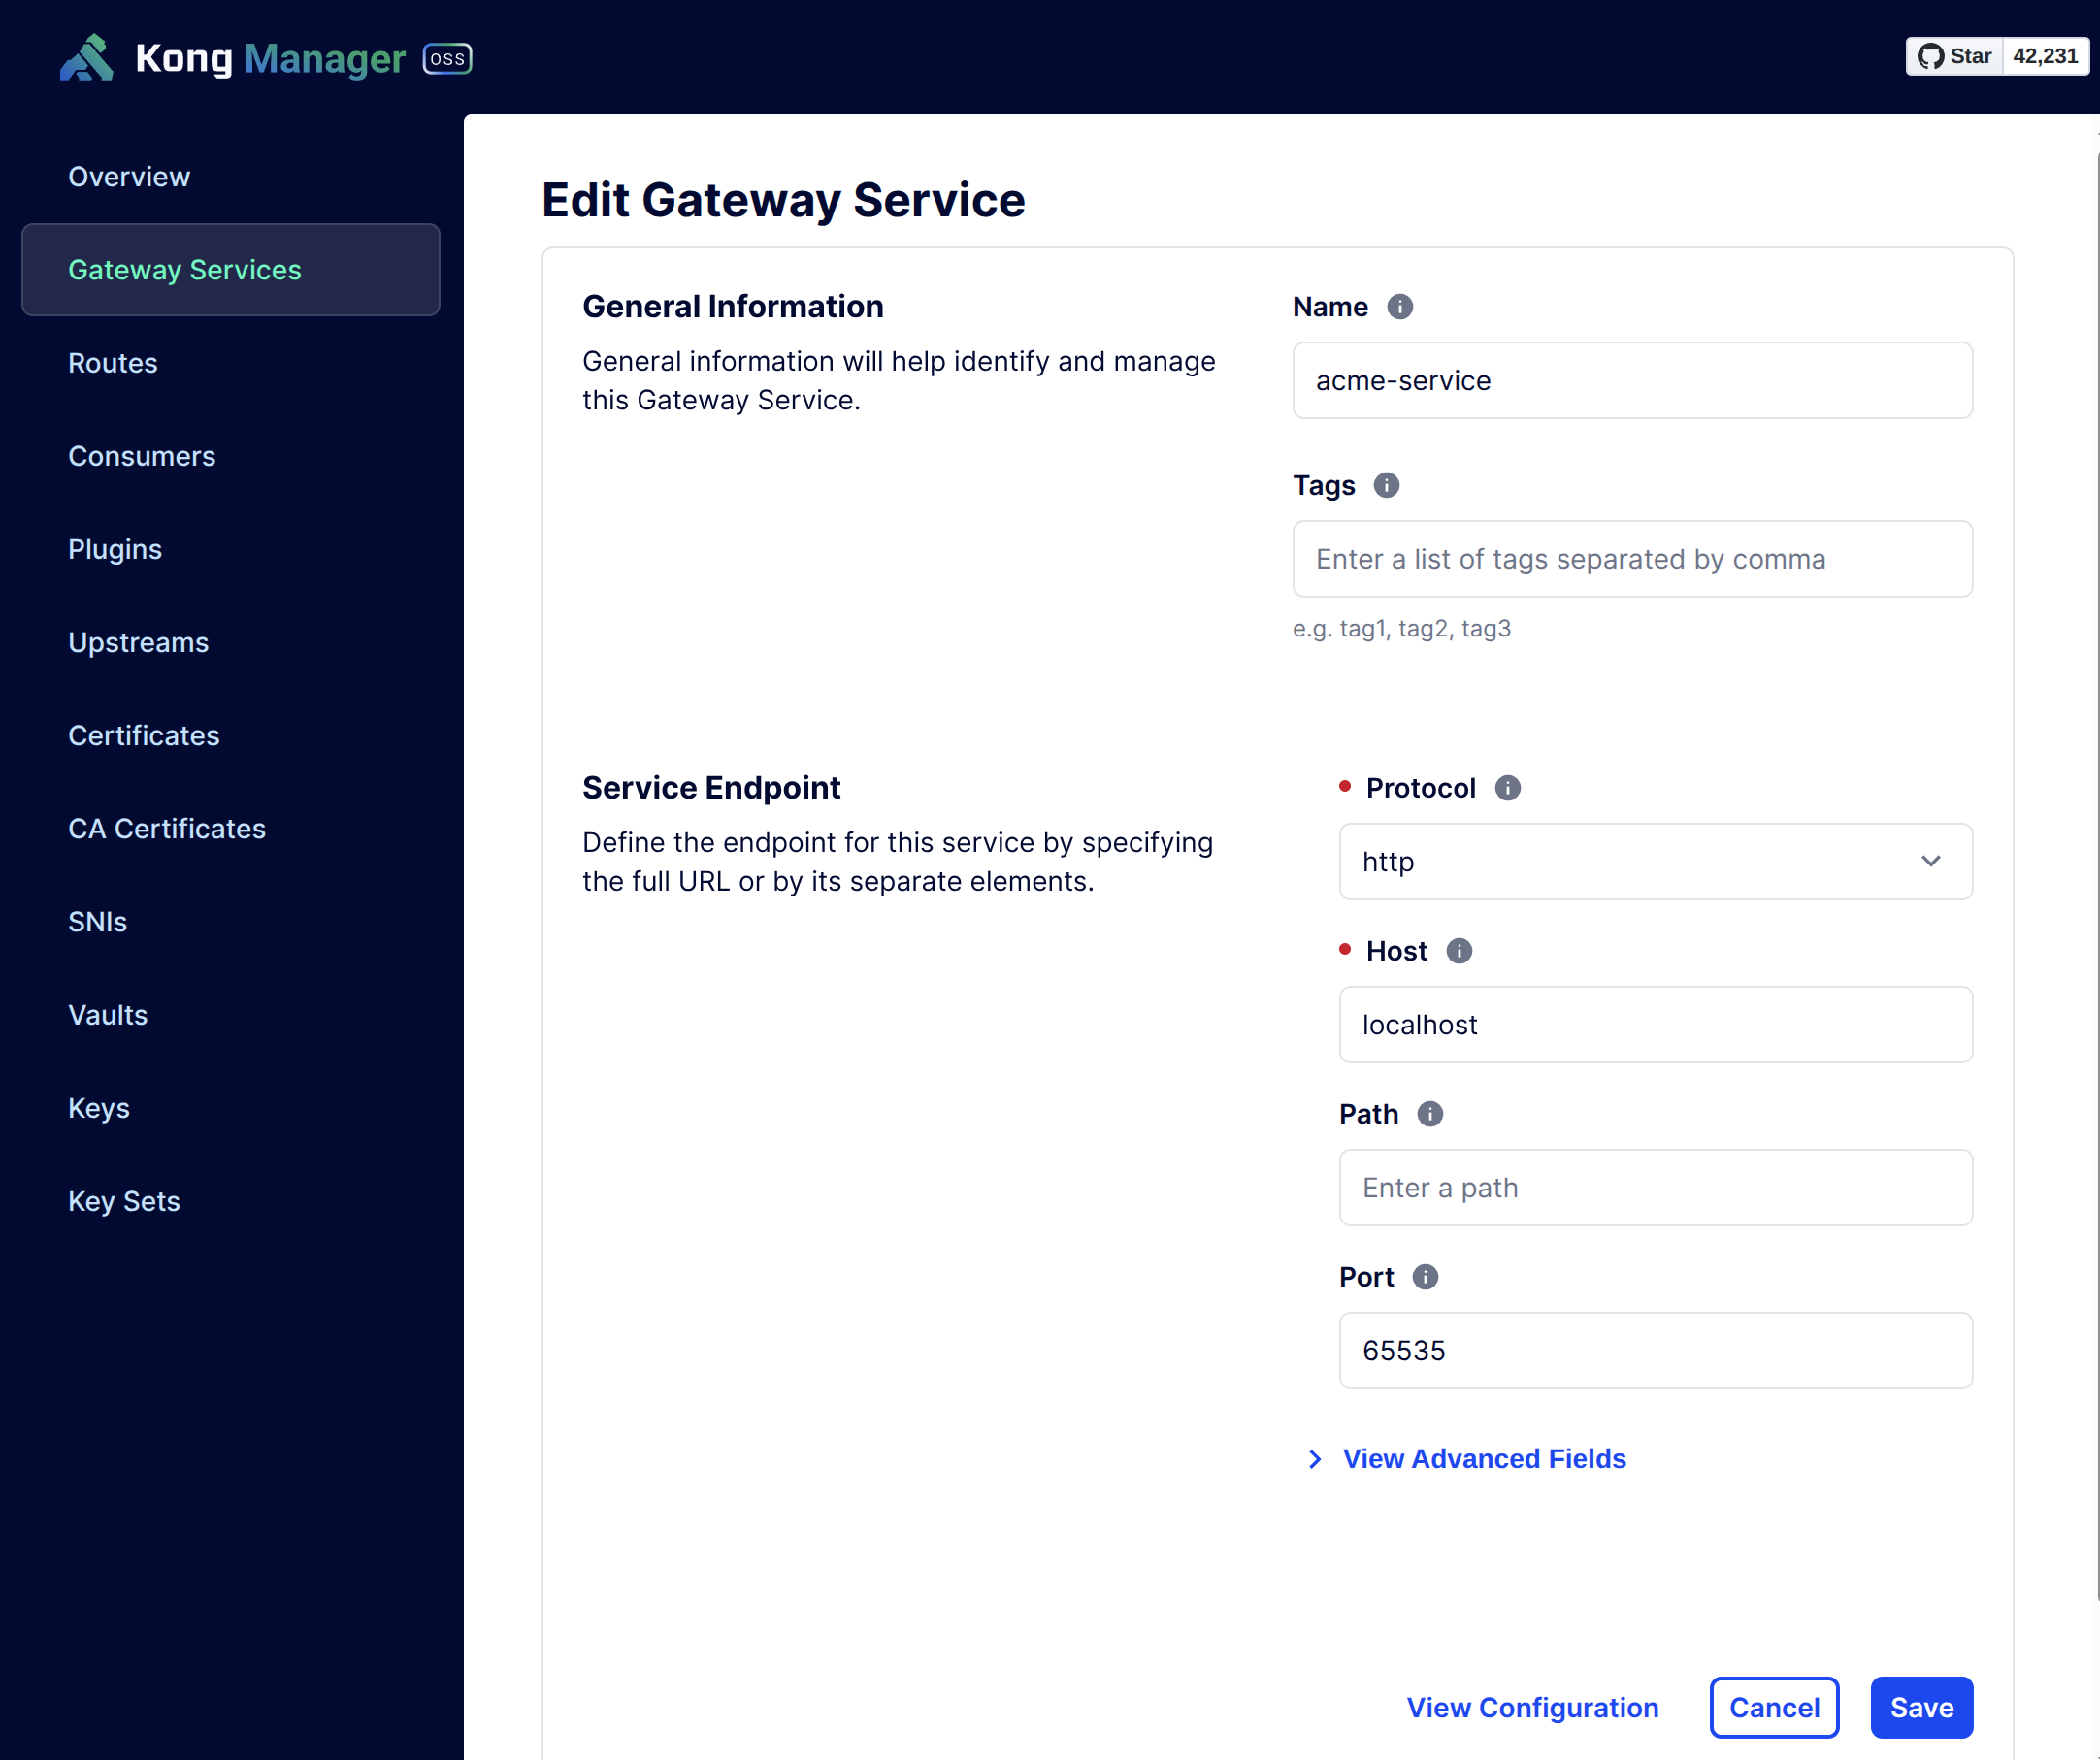
As you can see:
- host: localhost
- port: 65535
Both are meaningless values.
acme-route
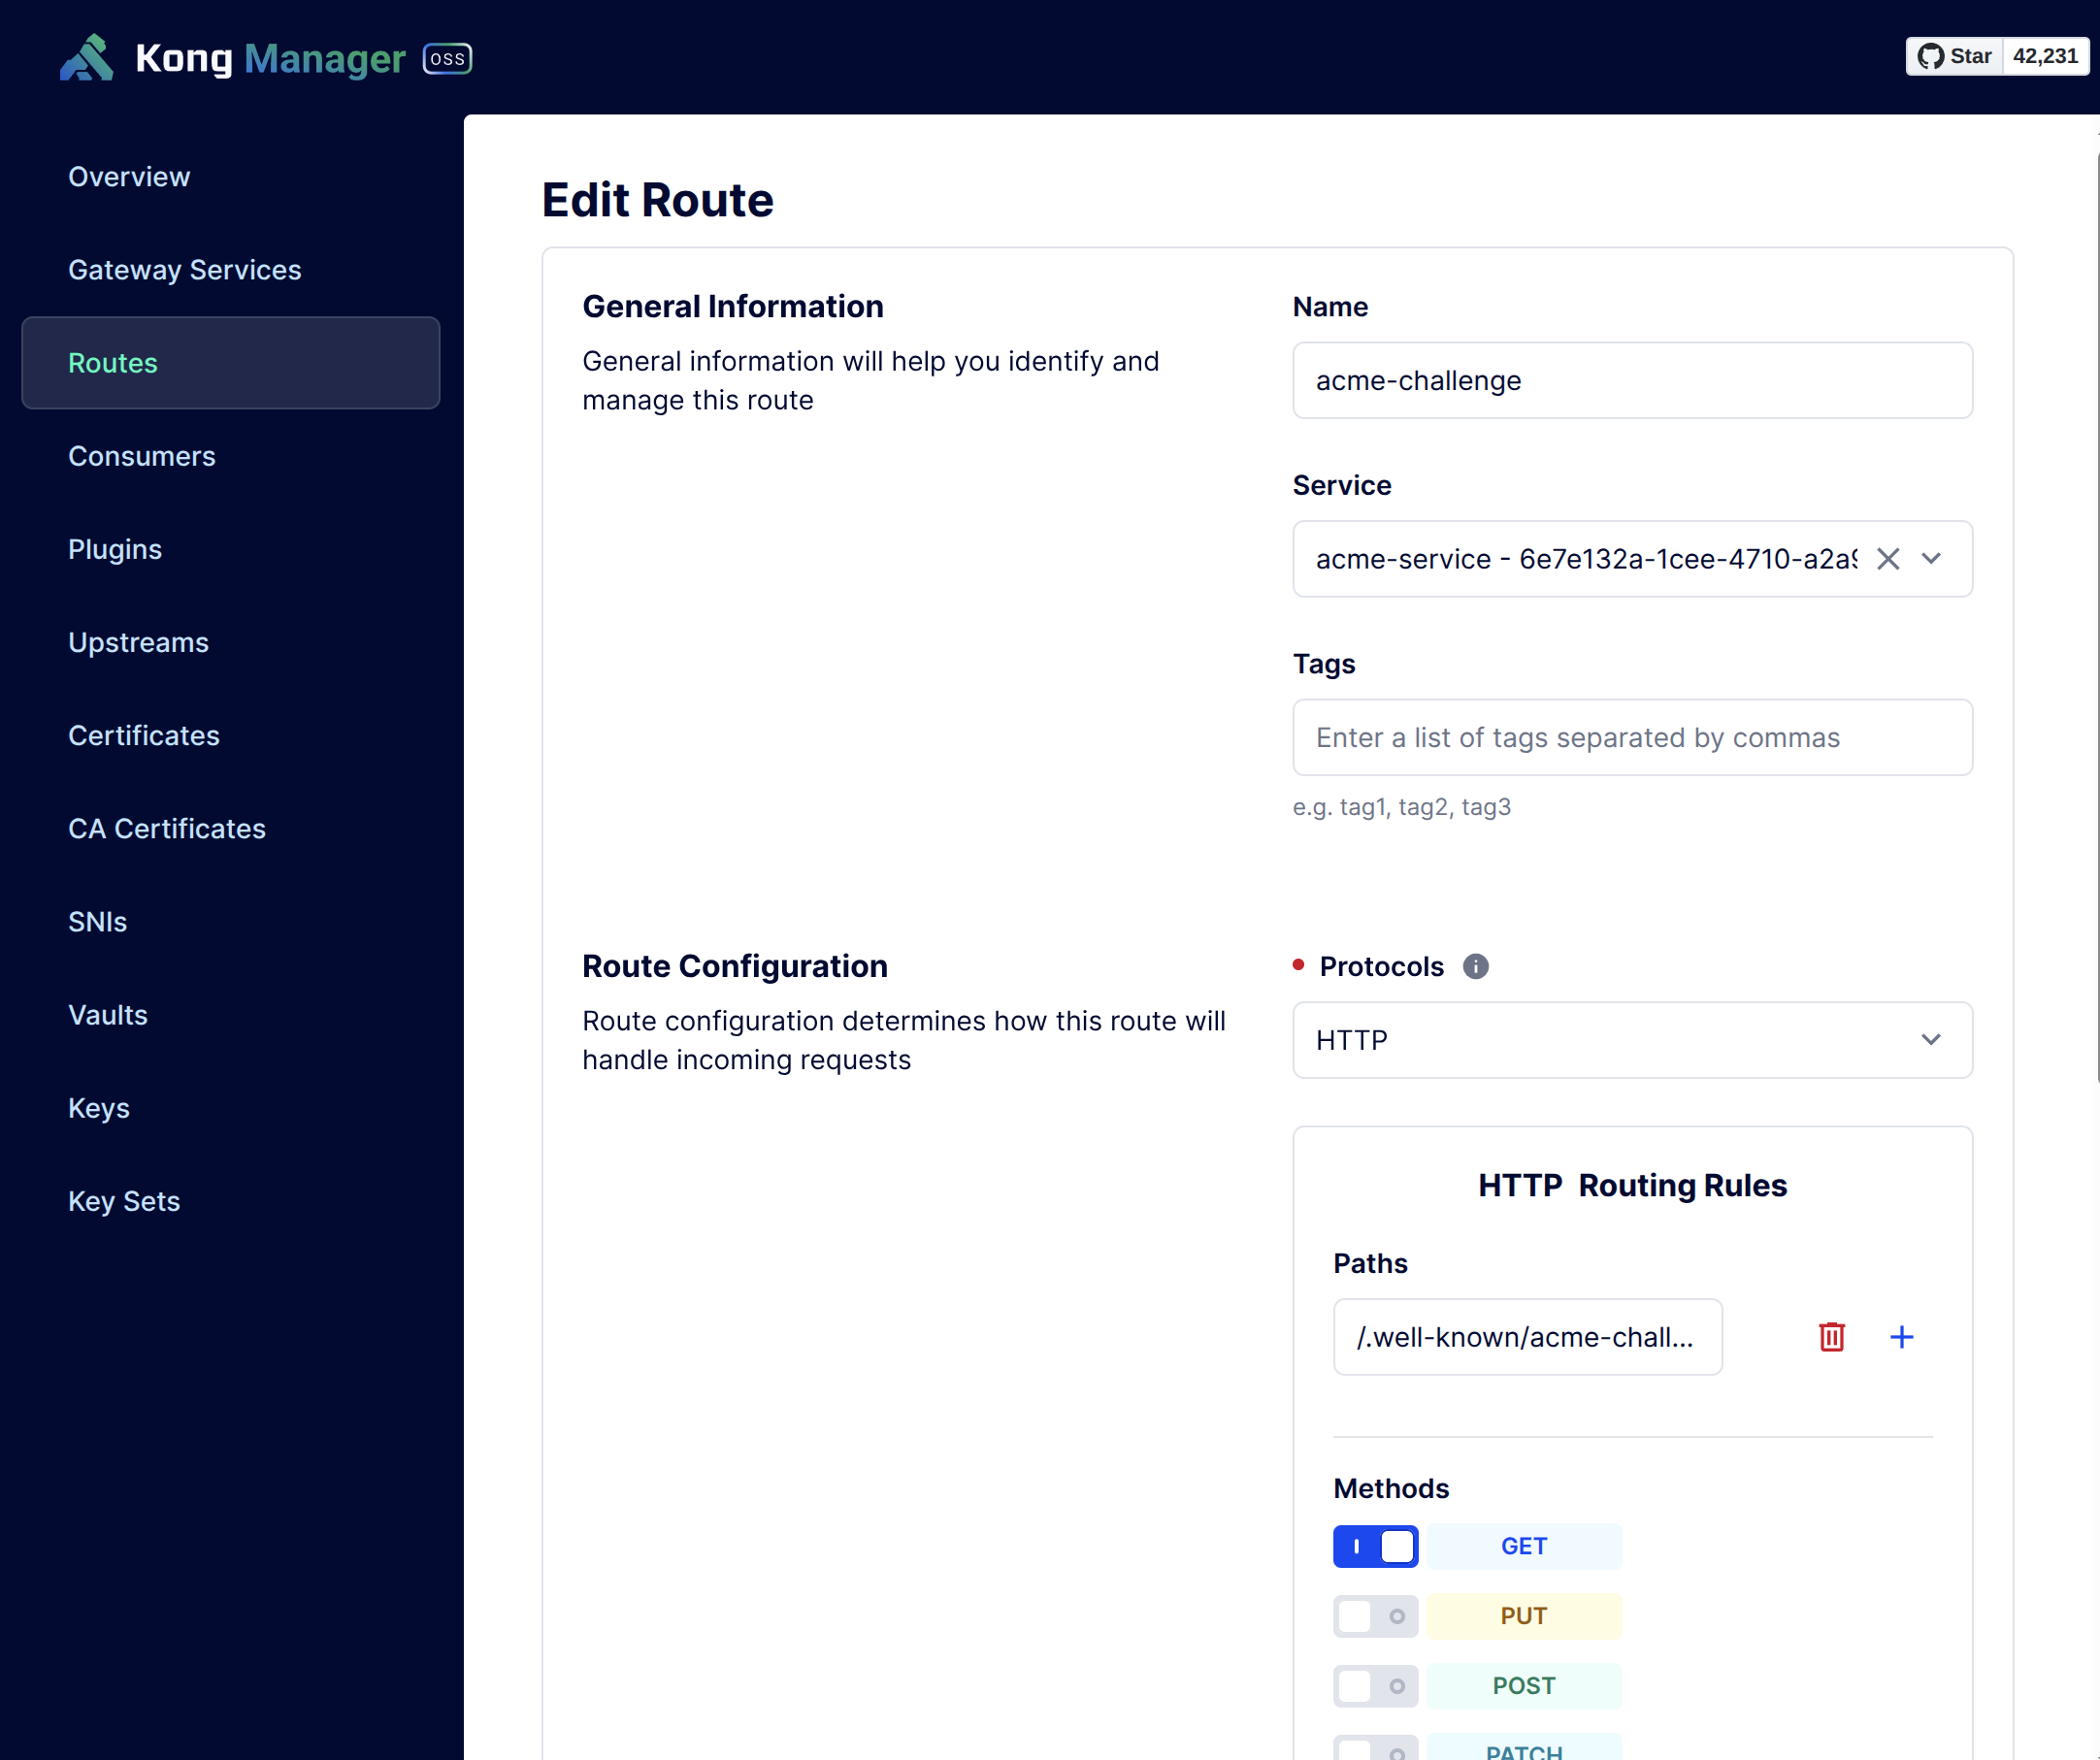
Note:
- Uncheck Strip Path
acme-plugin
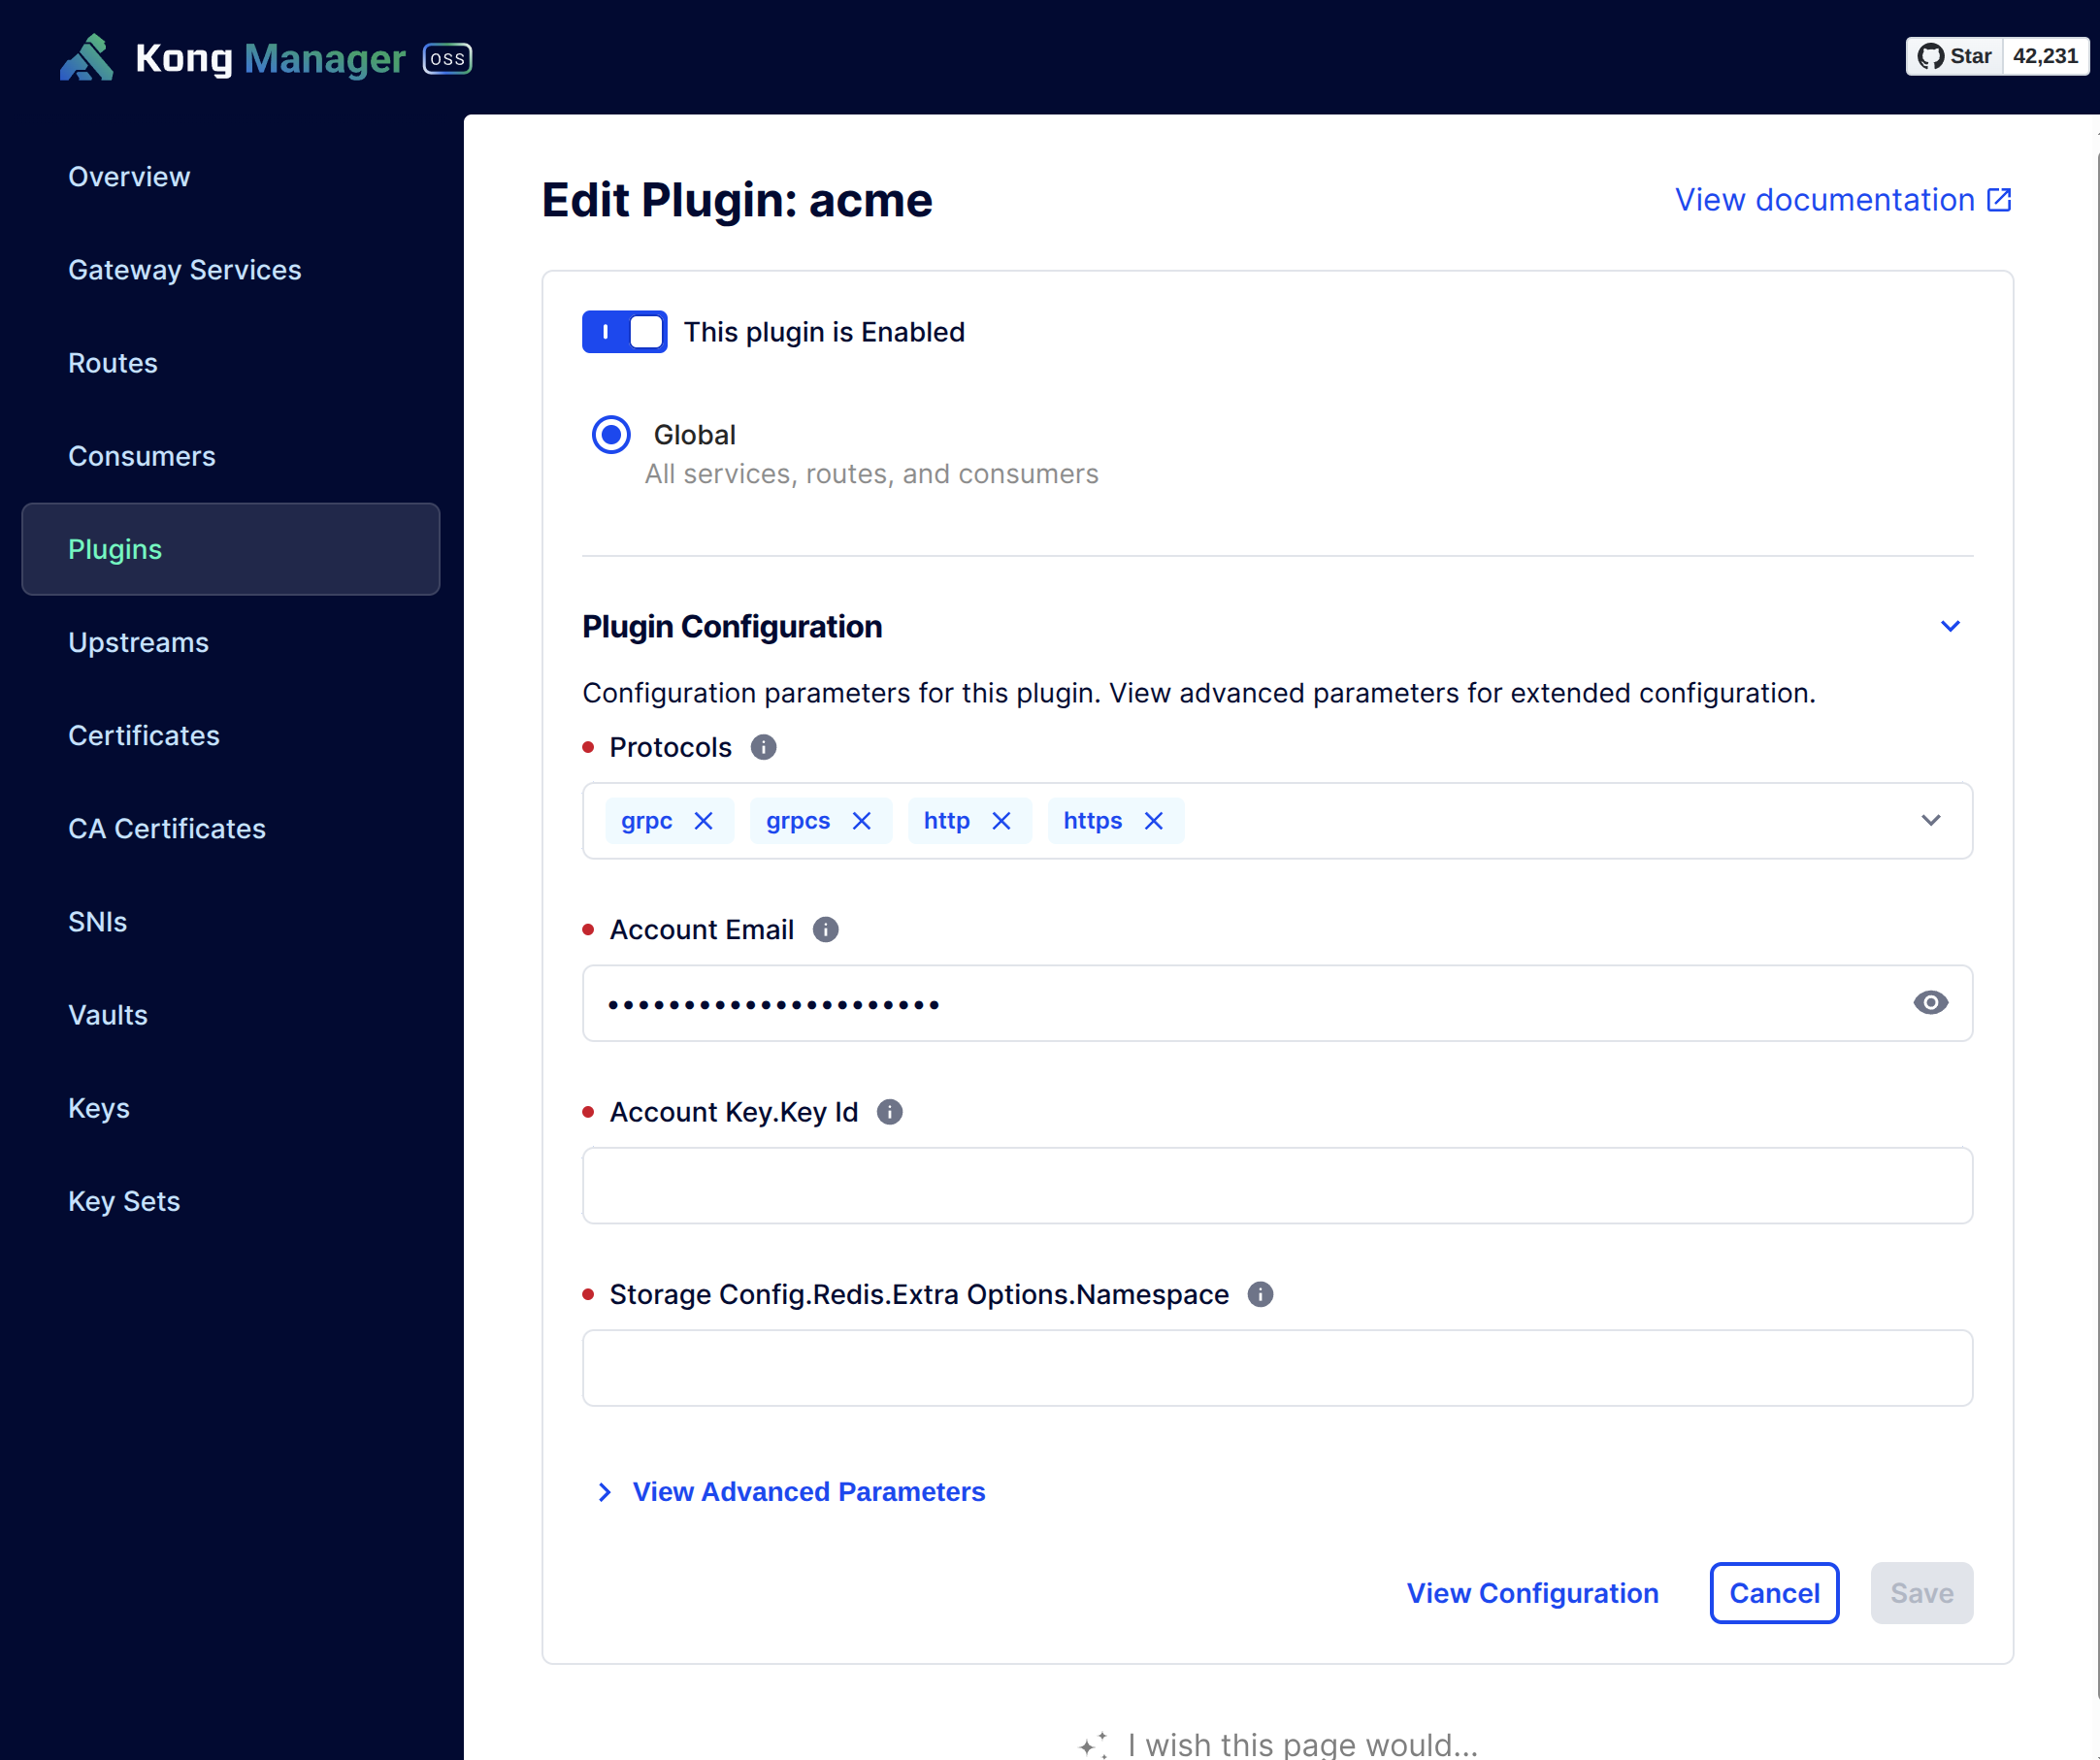
Note:
- You can add one or more domains to the
domainsoption - Or you can select
Allow Any Domain
At this point the ACME plugin is fully configured.
Create SSL Certificate
You can trigger certificate generation through the Kong Admin API:
curl http://localhost:8001/acme -d host=yourdomain.comAfter a few minutes you will see output like this:
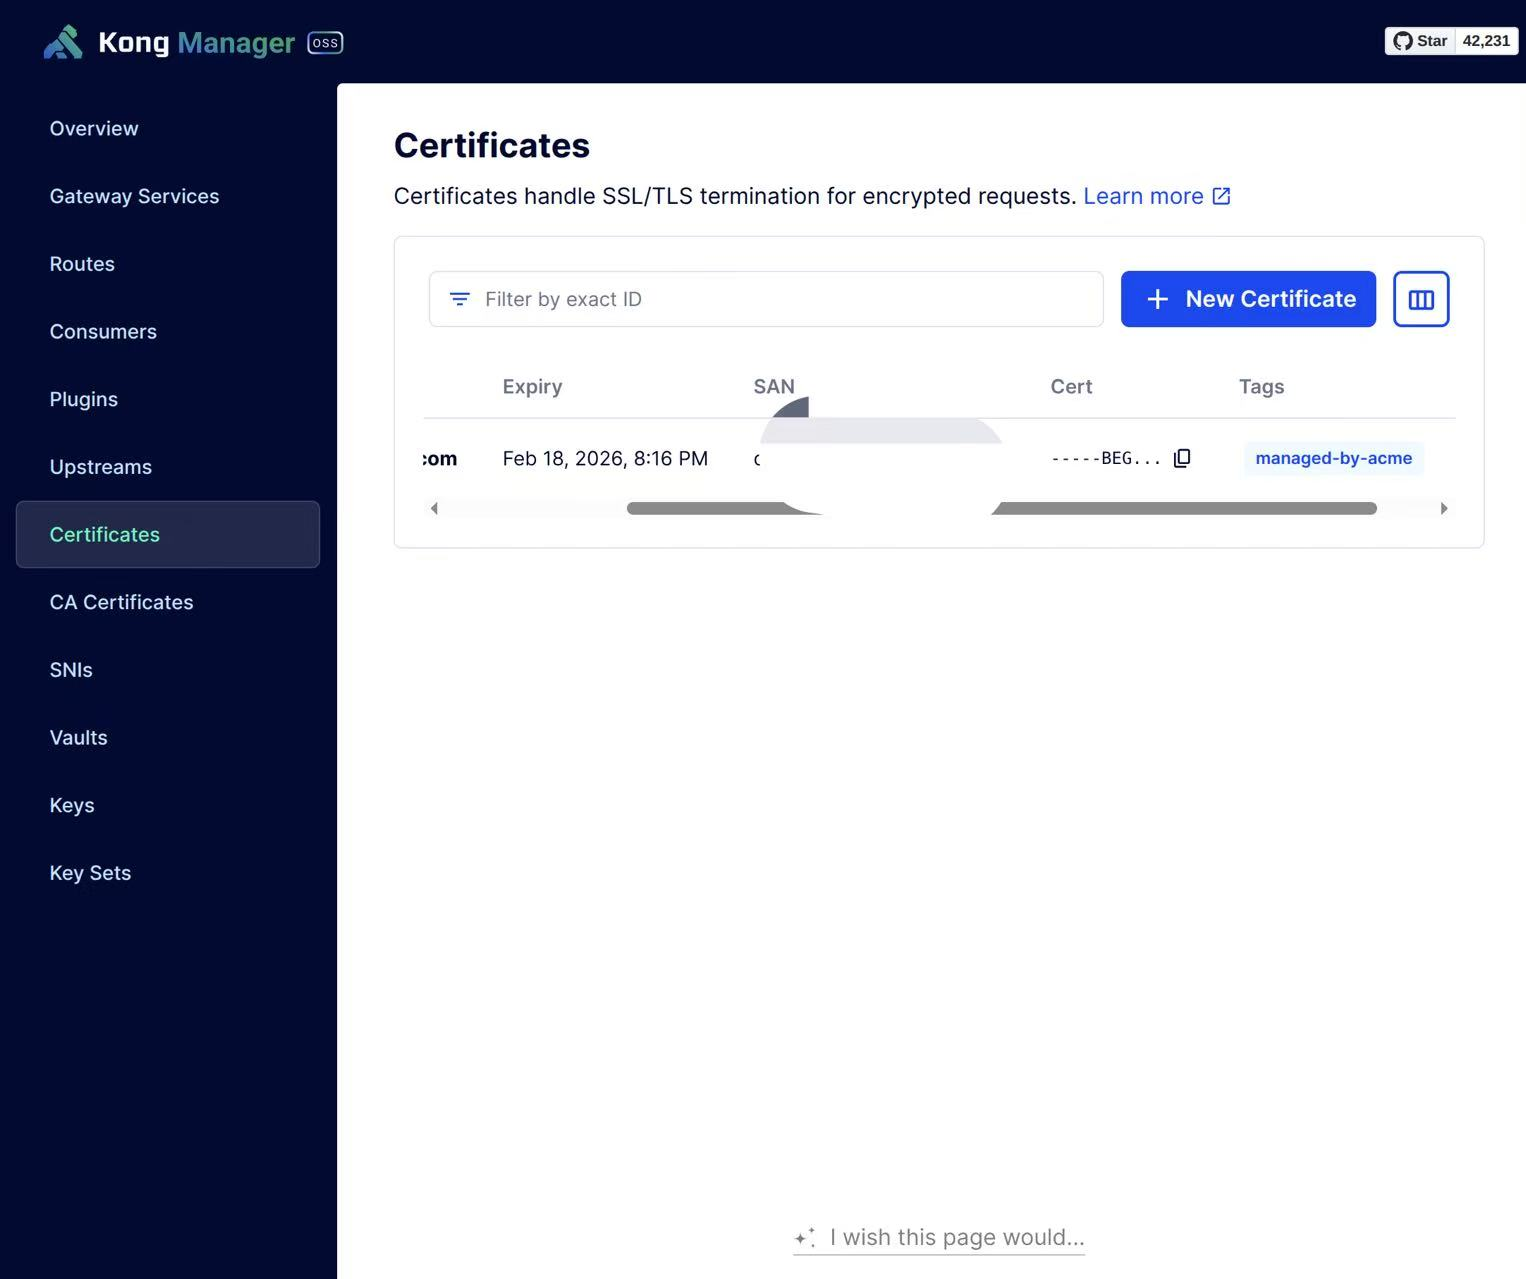
{"message":"certificate for host yourdomain.com is created"}Then under Kong Manager / Certificates you will see:
Securing Kong Manager access via domain (SSL + Auth)
To access Kong Manager through a domain with SSL, a few configuration changes are needed:
- Change the Kong Gateway environment variables
- Create the Kong Manager service & route
- Create the Kong Admin service & route
Change the Kong Gateway environment variables
- Change the
KONG_ADMIN_GUI_PATHandKONG_ADMIN_GUI_URLsettings - Change the
KONG_ADMIN_LISTENandKONG_ADMIN_API_URLsettings
For example:
    -e "KONG_ADMIN_LISTEN=0.0.0.0:8001,0.0.0.0:443 ssl" \
    -e "KONG_ADMIN_GUI_PATH=/kong-manager" \
    -e "KONG_ADMIN_GUI_URL=https://kong.yourdomain.com:443/kong-manager" \
    -e "KONG_ADMIN_API_URL=https://kong.yourdomain.com:443" \
Careful!!! Do not redeploy after making the changes!!! You need to wait until all of the following configuration is complete before redeploying.
Create the Kong Manager service & route
Because of the environment variable changes, editing configuration through the Kong Manager UI in the browser may run into cross-origin problems, so it is easiest to handle it directly with the Admin API:
curl -X POST 'http://localhost:8001/services' \
  -H 'content-type: application/json' \
  --data-raw '{"name":"kong-manager-service","tags":null,"read_timeout":60000,"retries":5,"connect_timeout":60000,"ca_certificates":null,"client_certificate":null,"write_timeout":60000,"port":8002,"url":"http://localhost:8002"}'
response:
{
    "tags": null,
    "ca_certificates": null,
    "path": null,
    "enabled": true,
    "connect_timeout": 60000,
    "tls_verify": null,
    "tls_verify_depth": null,
    "host": "localhost",
    "protocol": "http",
    "name": "kong-manager-service",
    "id": "ec7710e3-05ab-4891-9005-9c0d2aa80480",
    "retries": 5,
    "client_certificate": null,
    "created_at": 1763689846,
    "updated_at": 1763689846,
    "port": 8002,
    "write_timeout": 60000,
    "read_timeout": 60000
}
create route:
curl -X POST 'http://localhost:8001/services/ec7710e3-05ab-4891-9005-9c0d2aa80480/routes' \
  -H 'content-type: application/json' \
  --data-raw '{"name":"kong-manager-route","protocols":["http","https"],"https_redirect_status_code":426,"strip_path":false,"preserve_host":false,"request_buffering":true,"response_buffering":true,"tags":[],"service":{"id":"ec7710e3-05ab-4891-9005-9c0d2aa80480"},"methods":null,"hosts":["kong.yourdomain.com"],"paths":["/kong-manager"],"headers":null,"regex_priority":0,"path_handling":"v0","sources":null,"destinations":null,"snis":null}'
response:
{
    "tags": [],
    "strip_path": false,
    "sources": null,
    "destinations": null,
    "regex_priority": 0,
    "methods": null,
    "paths": [
        "/kong-manager"
    ],
    "service": {
        "id": "ec7710e3-05ab-4891-9005-9c0d2aa80480"
    },
    "name": "kong-manager-route",
    "response_buffering": true,
    "https_redirect_status_code": 426,
    "protocols": [
        "http",
        "https"
    ],
    "path_handling": "v0",
    "id": "4c8b1b53-2448-4f59-8084-9ae58be93149",
    "headers": null,
    "preserve_host": false,
    "hosts": [
        "kong.yourdomain.com"
    ],
    "created_at": 1763689973,
    "updated_at": 1763689973,
    "snis": null,
    "request_buffering": true
}
Create the Kong Admin service & route
create service:
curl -X POST 'http://localhost:8001/services' \
  -H 'content-type: application/json' \
  --data-raw '{"name":"kong-admin-service","tags":null,"read_timeout":60000,"retries":5,"connect_timeout":60000,"ca_certificates":null,"client_certificate":null,"write_timeout":60000,"port":8001,"url":"http://localhost:8001"}'
response:
{
    "tags": null,
    "ca_certificates": null,
    "path": null,
    "enabled": true,
    "connect_timeout": 60000,
    "tls_verify": null,
    "tls_verify_depth": null,
    "host": "localhost",
    "protocol": "http",
    "name": "kong-admin-service",
    "id": "fc4894e6-67bf-4f17-88d5-8bbad39789d0",
    "retries": 5,
    "client_certificate": null,
    "created_at": 1763689549,
    "updated_at": 1763689549,
    "port": 8001,
    "write_timeout": 60000,
    "read_timeout": 60000
}
create route:
curl -X POST 'http://localhost:8001/services/fc4894e6-67bf-4f17-88d5-8bbad39789d0/routes' \
  -H 'content-type: application/json' \
  --data-raw '{"name":"kong-admin-route","protocols":["http","https"],"https_redirect_status_code":426,"strip_path":false,"preserve_host":false,"request_buffering":true,"response_buffering":true,"tags":[],"service":{"id":"fc4894e6-67bf-4f17-88d5-8bbad39789d0"},"methods":null,"hosts":["kong.yourdomain.com"],"paths":["/"],"headers":null,"regex_priority":0,"path_handling":"v0","sources":null,"destinations":null,"snis":null}'
response:
{
    "tags": [],
    "strip_path": false,
    "sources": null,
    "destinations": null,
    "regex_priority": 0,
    "methods": null,
    "paths": [
        "/"
    ],
    "service": {
        "id": "fc4894e6-67bf-4f17-88d5-8bbad39789d0"
    },
    "name": "kong-admin-route",
    "response_buffering": true,
    "https_redirect_status_code": 426,
    "protocols": [
        "http",
        "https"
    ],
    "path_handling": "v0",
    "id": "124de03d-1b0a-4472-b8e3-0e31a3f3a36b",
    "headers": null,
    "preserve_host": false,
    "hosts": [
        "kong.yourdomain.com"
    ],
    "created_at": 1763689715,
    "updated_at": 1763689715,
    "snis": null,
    "request_buffering": true
}
Configure the authentication plugins for Kong Manager
The Kong Gateway we use is the open-source edition, and Kong Manager is open-source as well, so by default there is no access control. With domain access enabled (which means the public internet can reach it), that is very dangerous.
To solve this, we can do the following:
- Enable an IP allowlist on the server so that only your IP can access it
- Add an authentication plugin to Kong Manager
We won’t cover IP access control on the server here. We will focus on how to add authentication to Kong Manager.
In the previous sections we created services & routes for both kong manager & kong admin, so naturally our authentication plugins can go on these two services or routes. Since routes may be added to a service later, putting the authentication plugin on the service is a bit safer.
So which authentication plugin is the best fit? We use Basic Auth here, mainly because:
- Browsers support Basic Auth well and pop up the Basic Auth form wherever authentication is needed, so we don’t have to change any part of the Kong Manager UI
Note: if you run into problems configuring things in the Kong Manager UI, switch to the Kong Admin API — it can do anything!!!
Configure the Basic Auth plugin
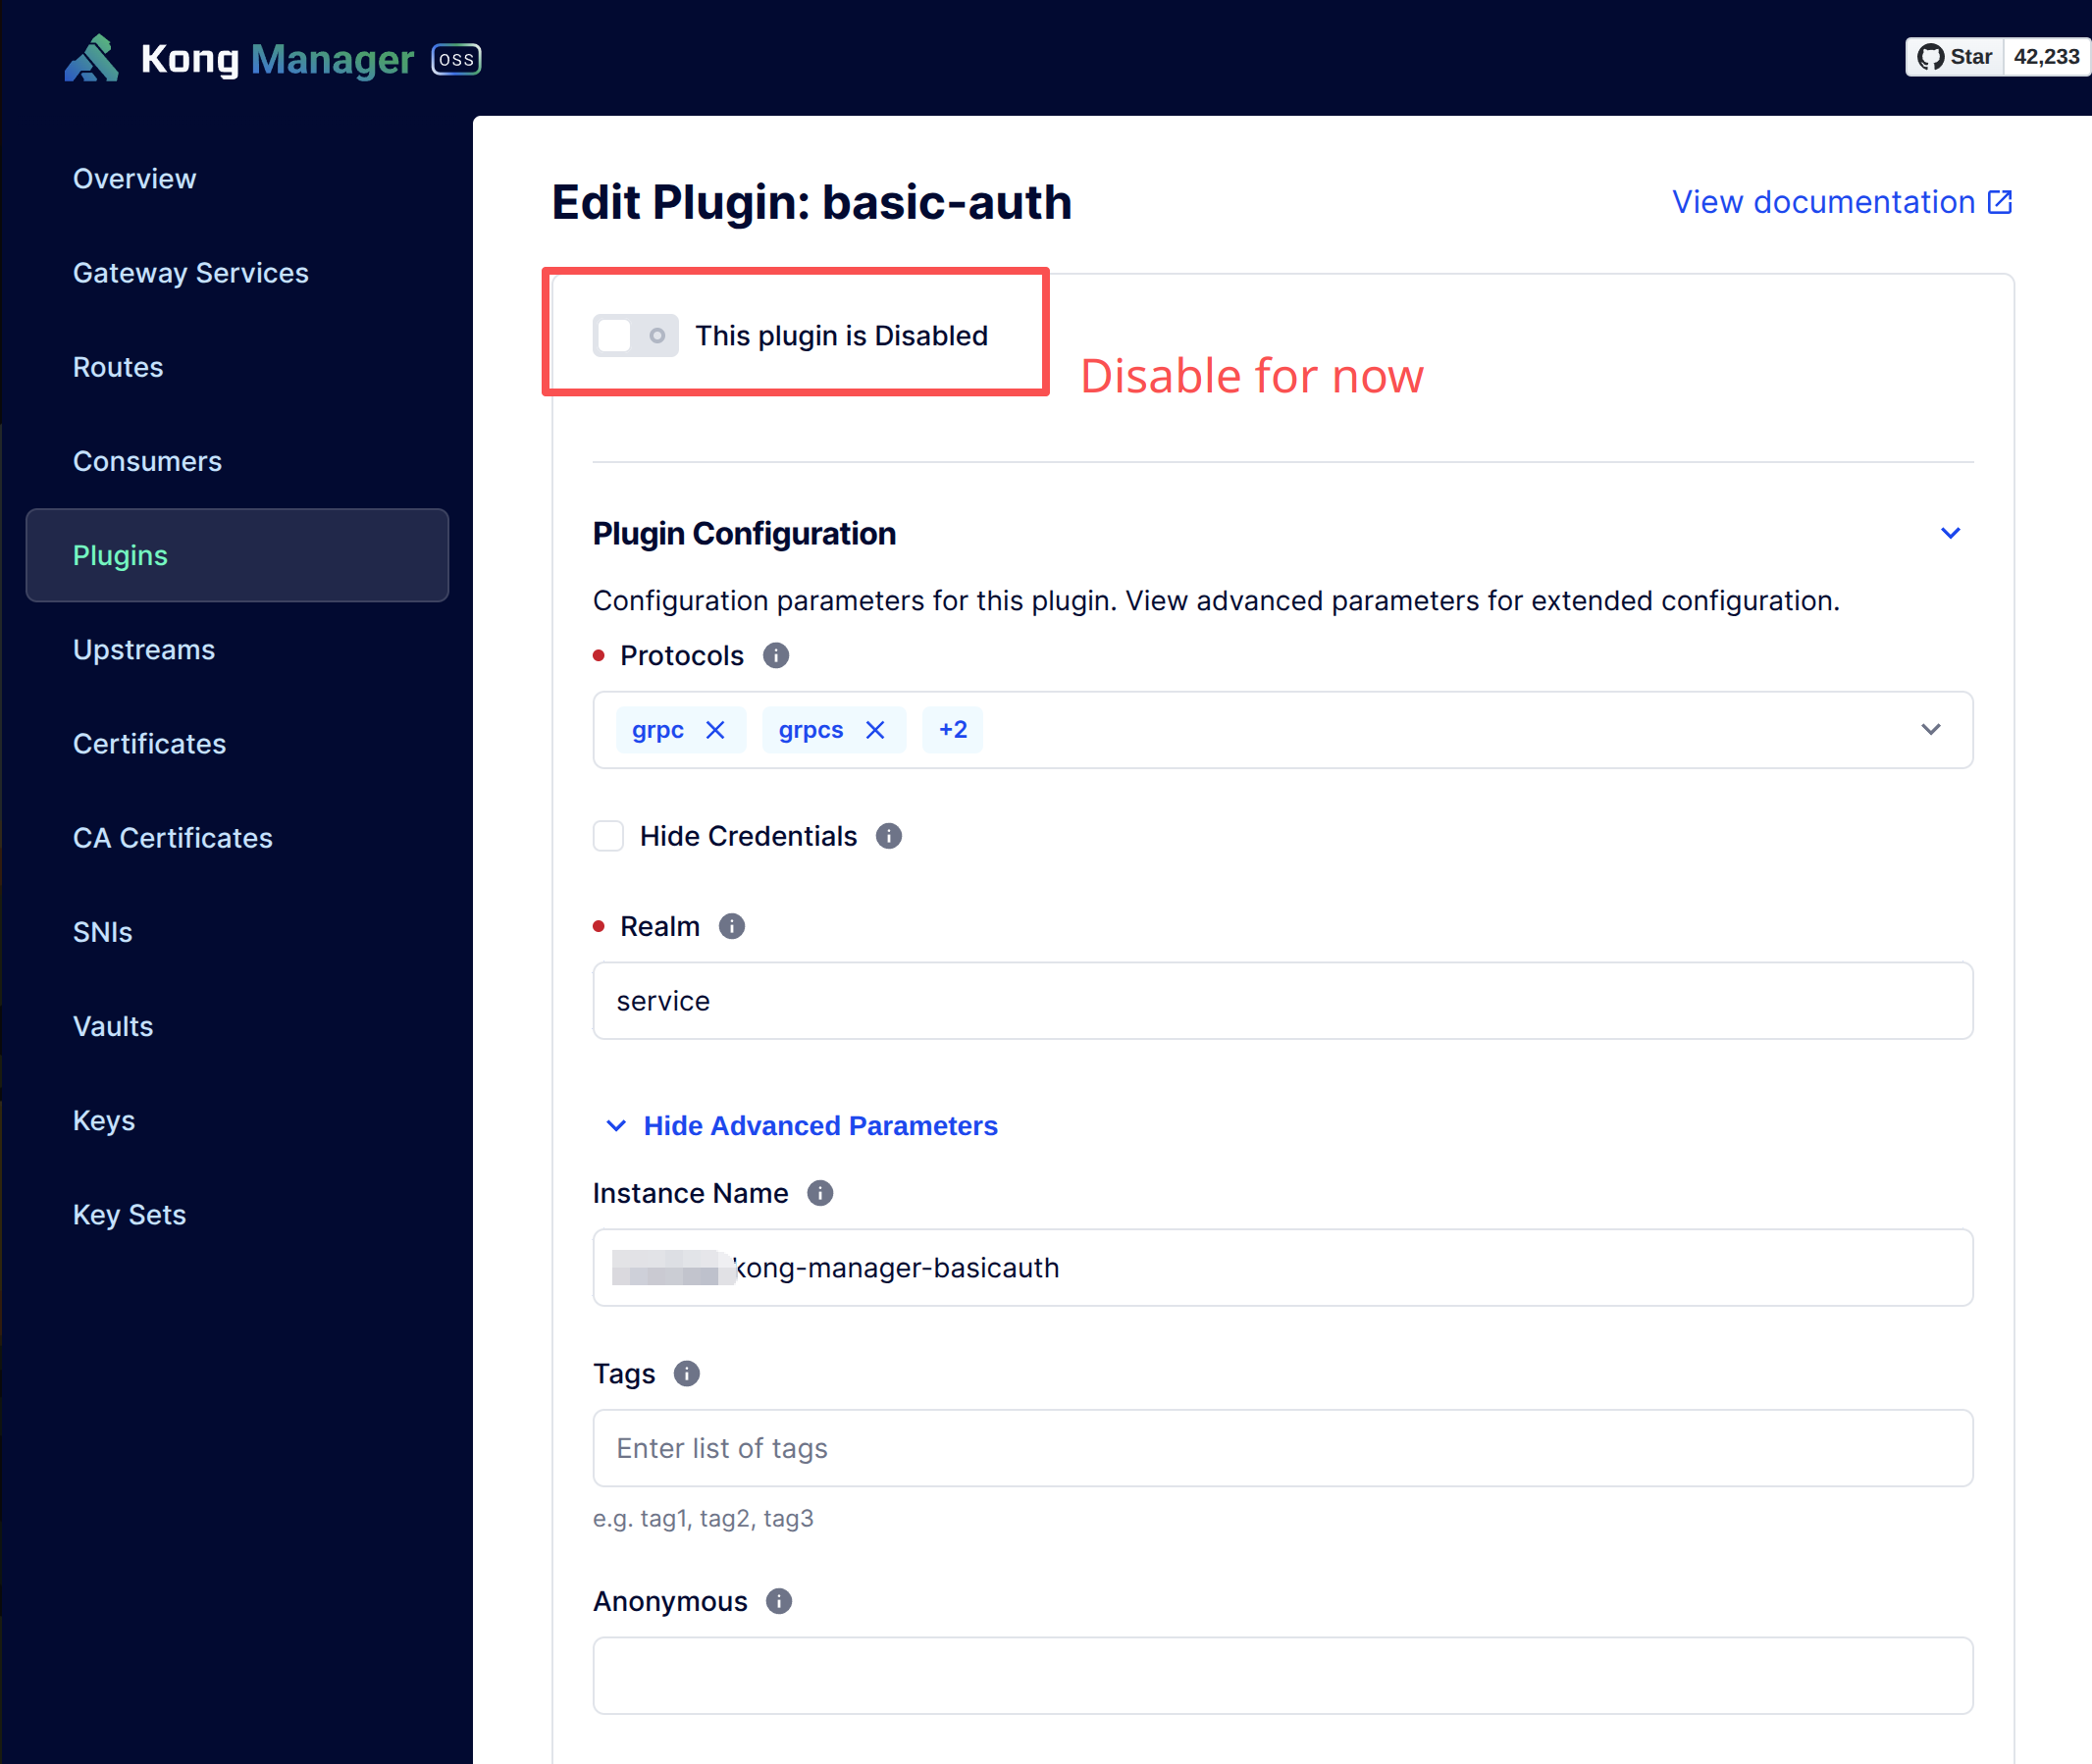
Add the Basic Auth plugin to the Kong Manager service:
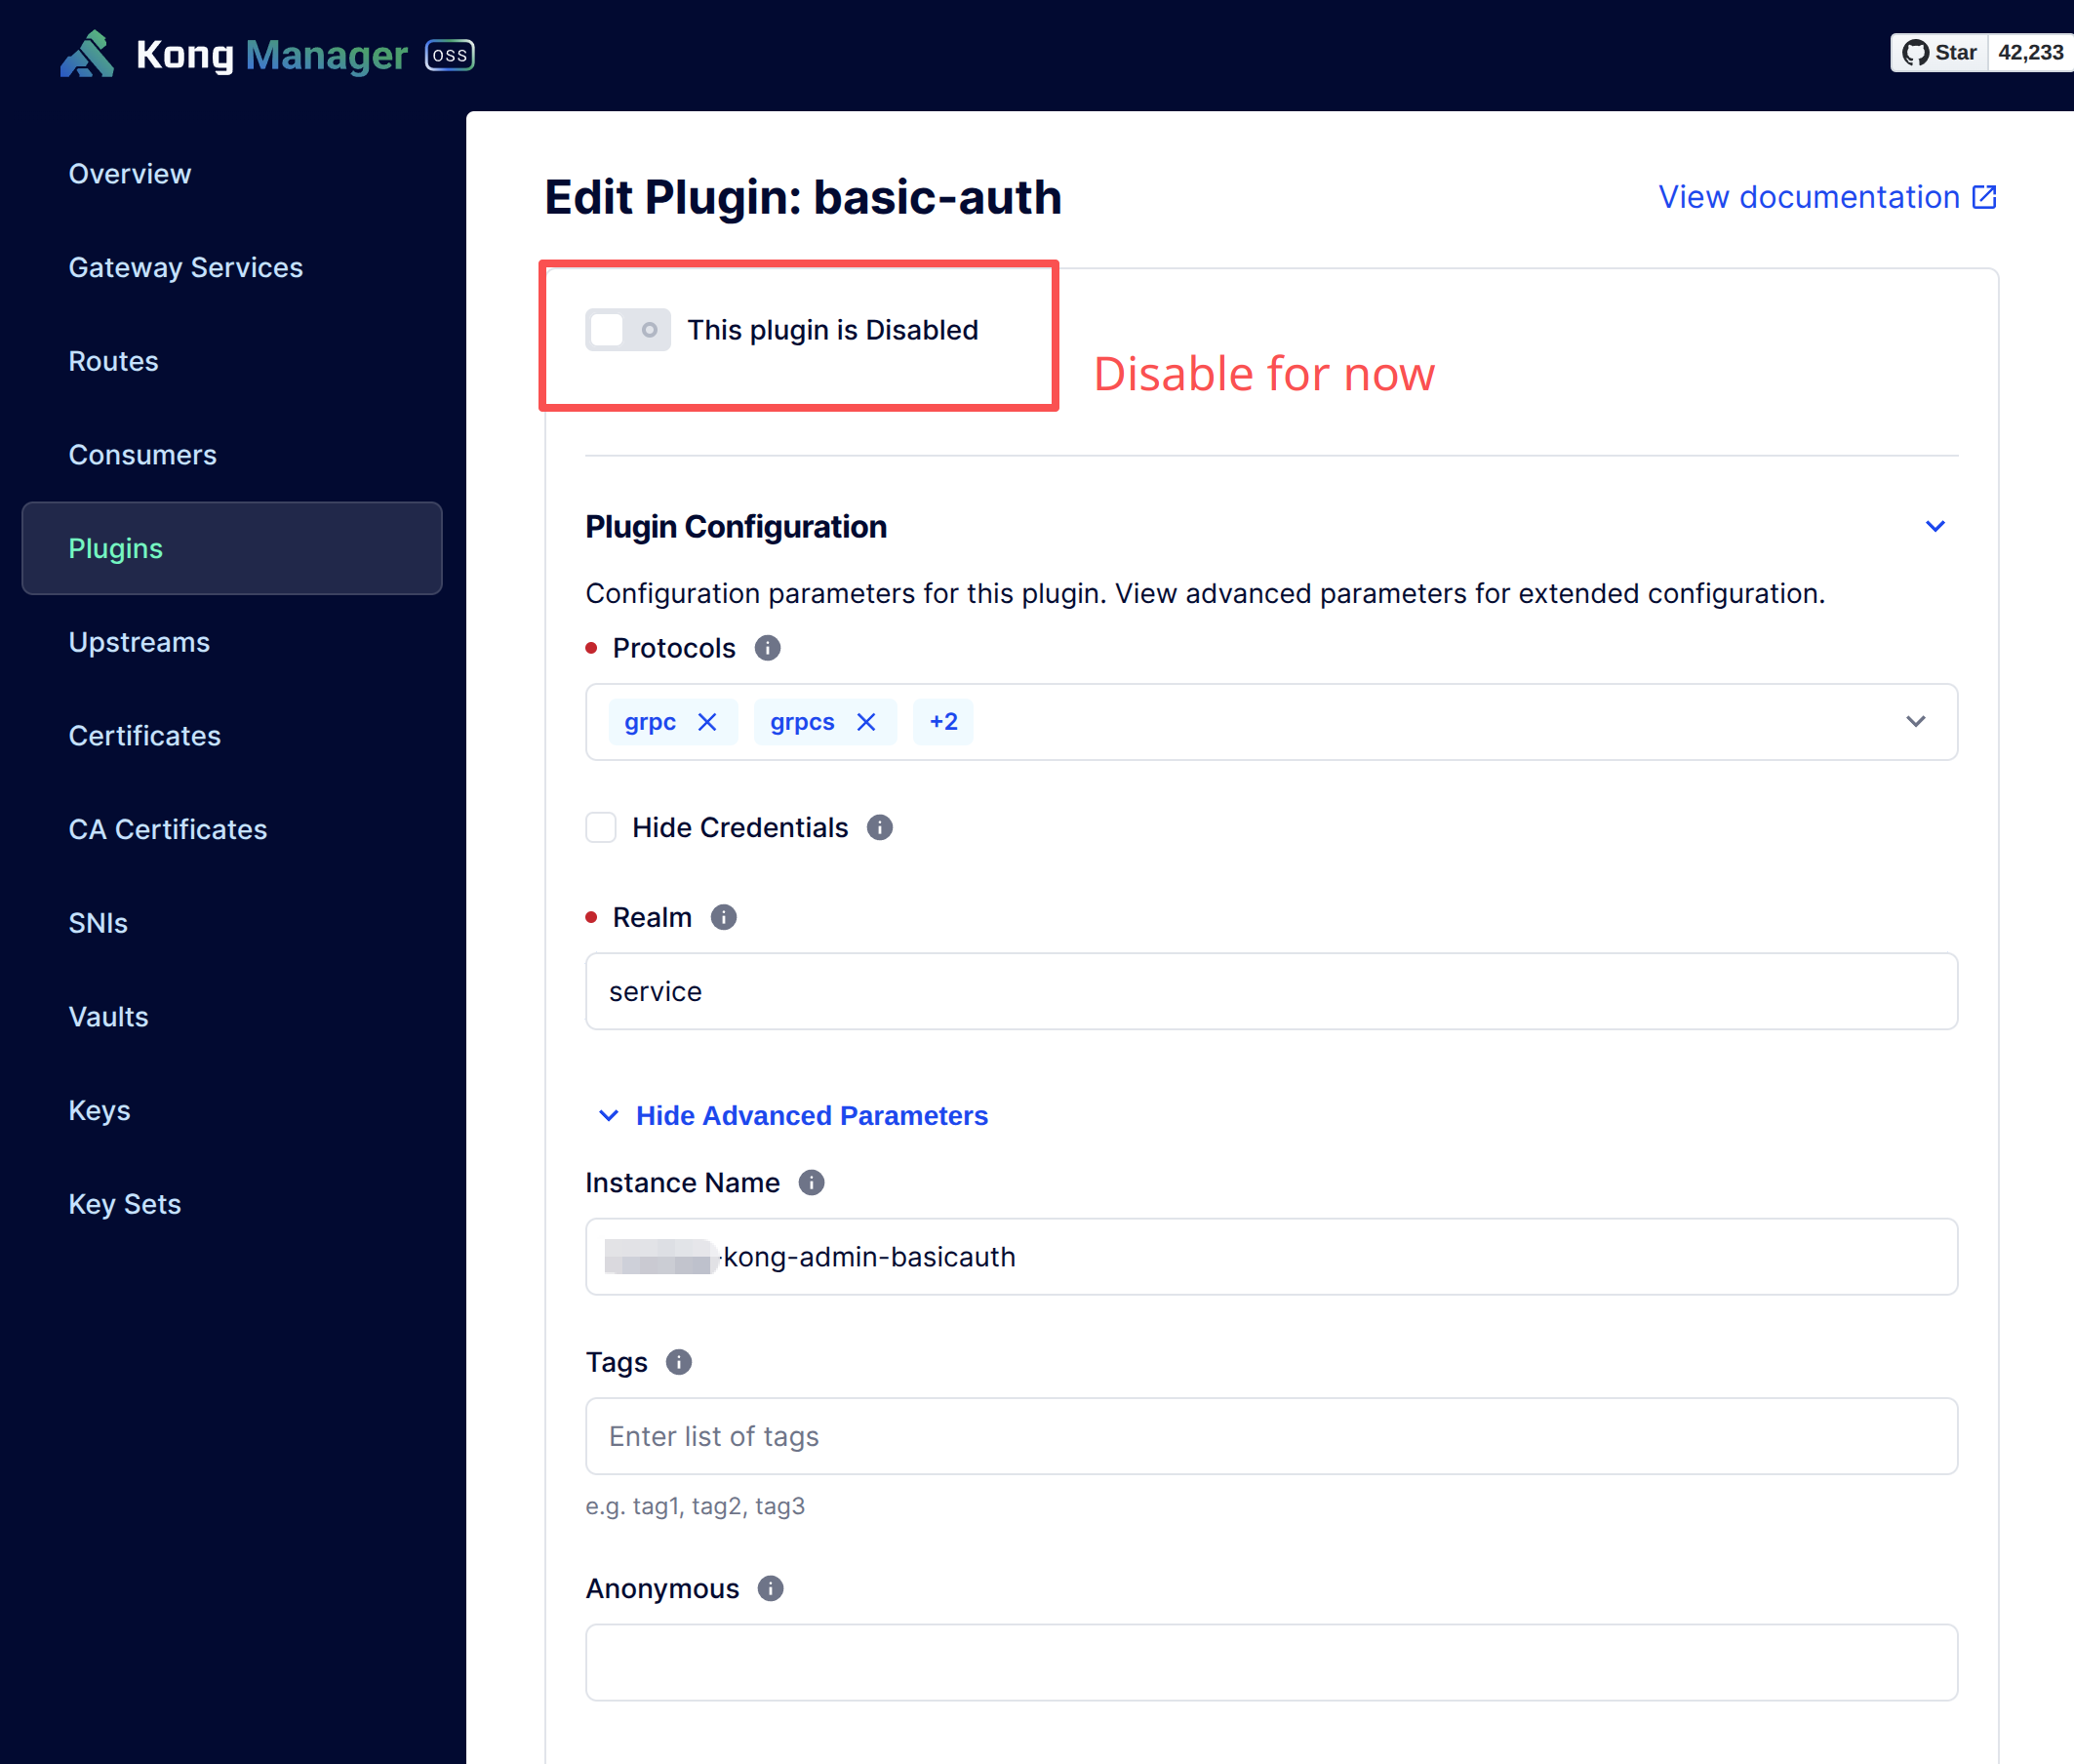
Add the Basic Auth plugin to the Kong Admin service:
Configure the ACL plugin
The Basic Auth plugin alone is not enough, because as long as Basic Auth credentials exist anywhere else in Kong, those credentials can also log in and access Kong Manager, which is effectively a privilege escalation. To avoid this, we also need the ACL plugin to control which Basic Auth credentials can access Kong Manager.
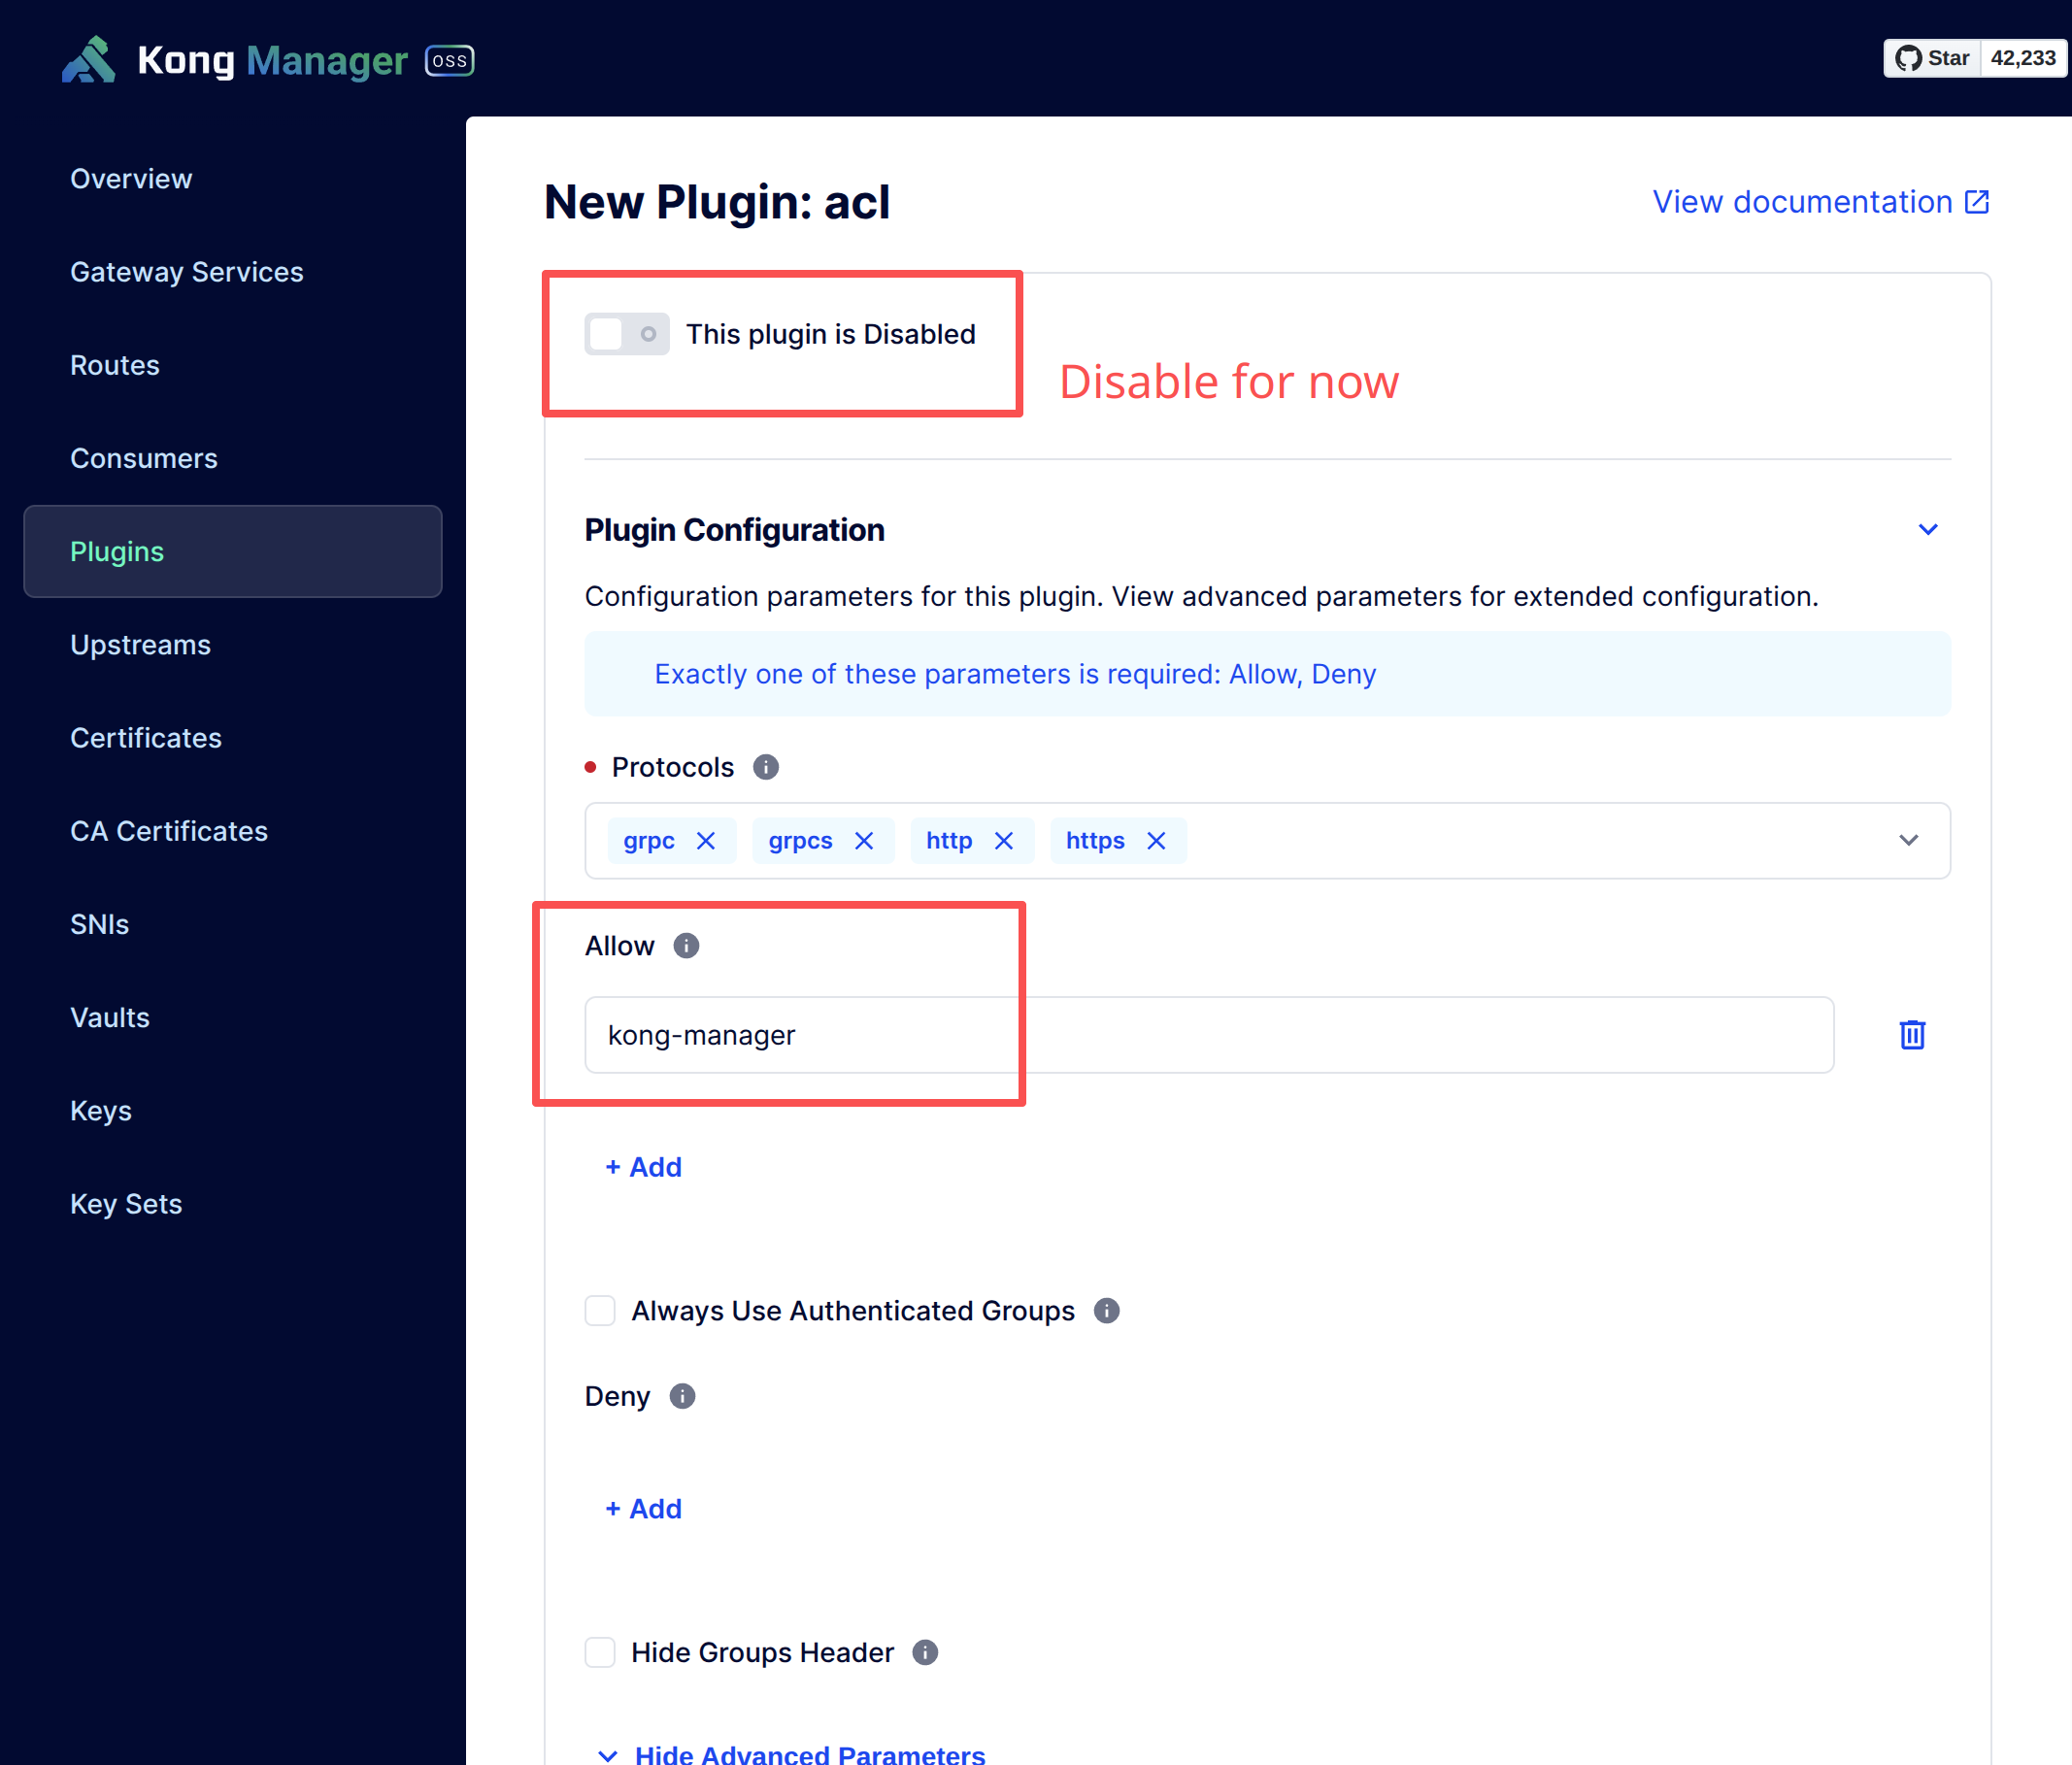
Add the ACL plugin to the Kong Manager service:
Add the ACL plugin to the Kong Admin service:
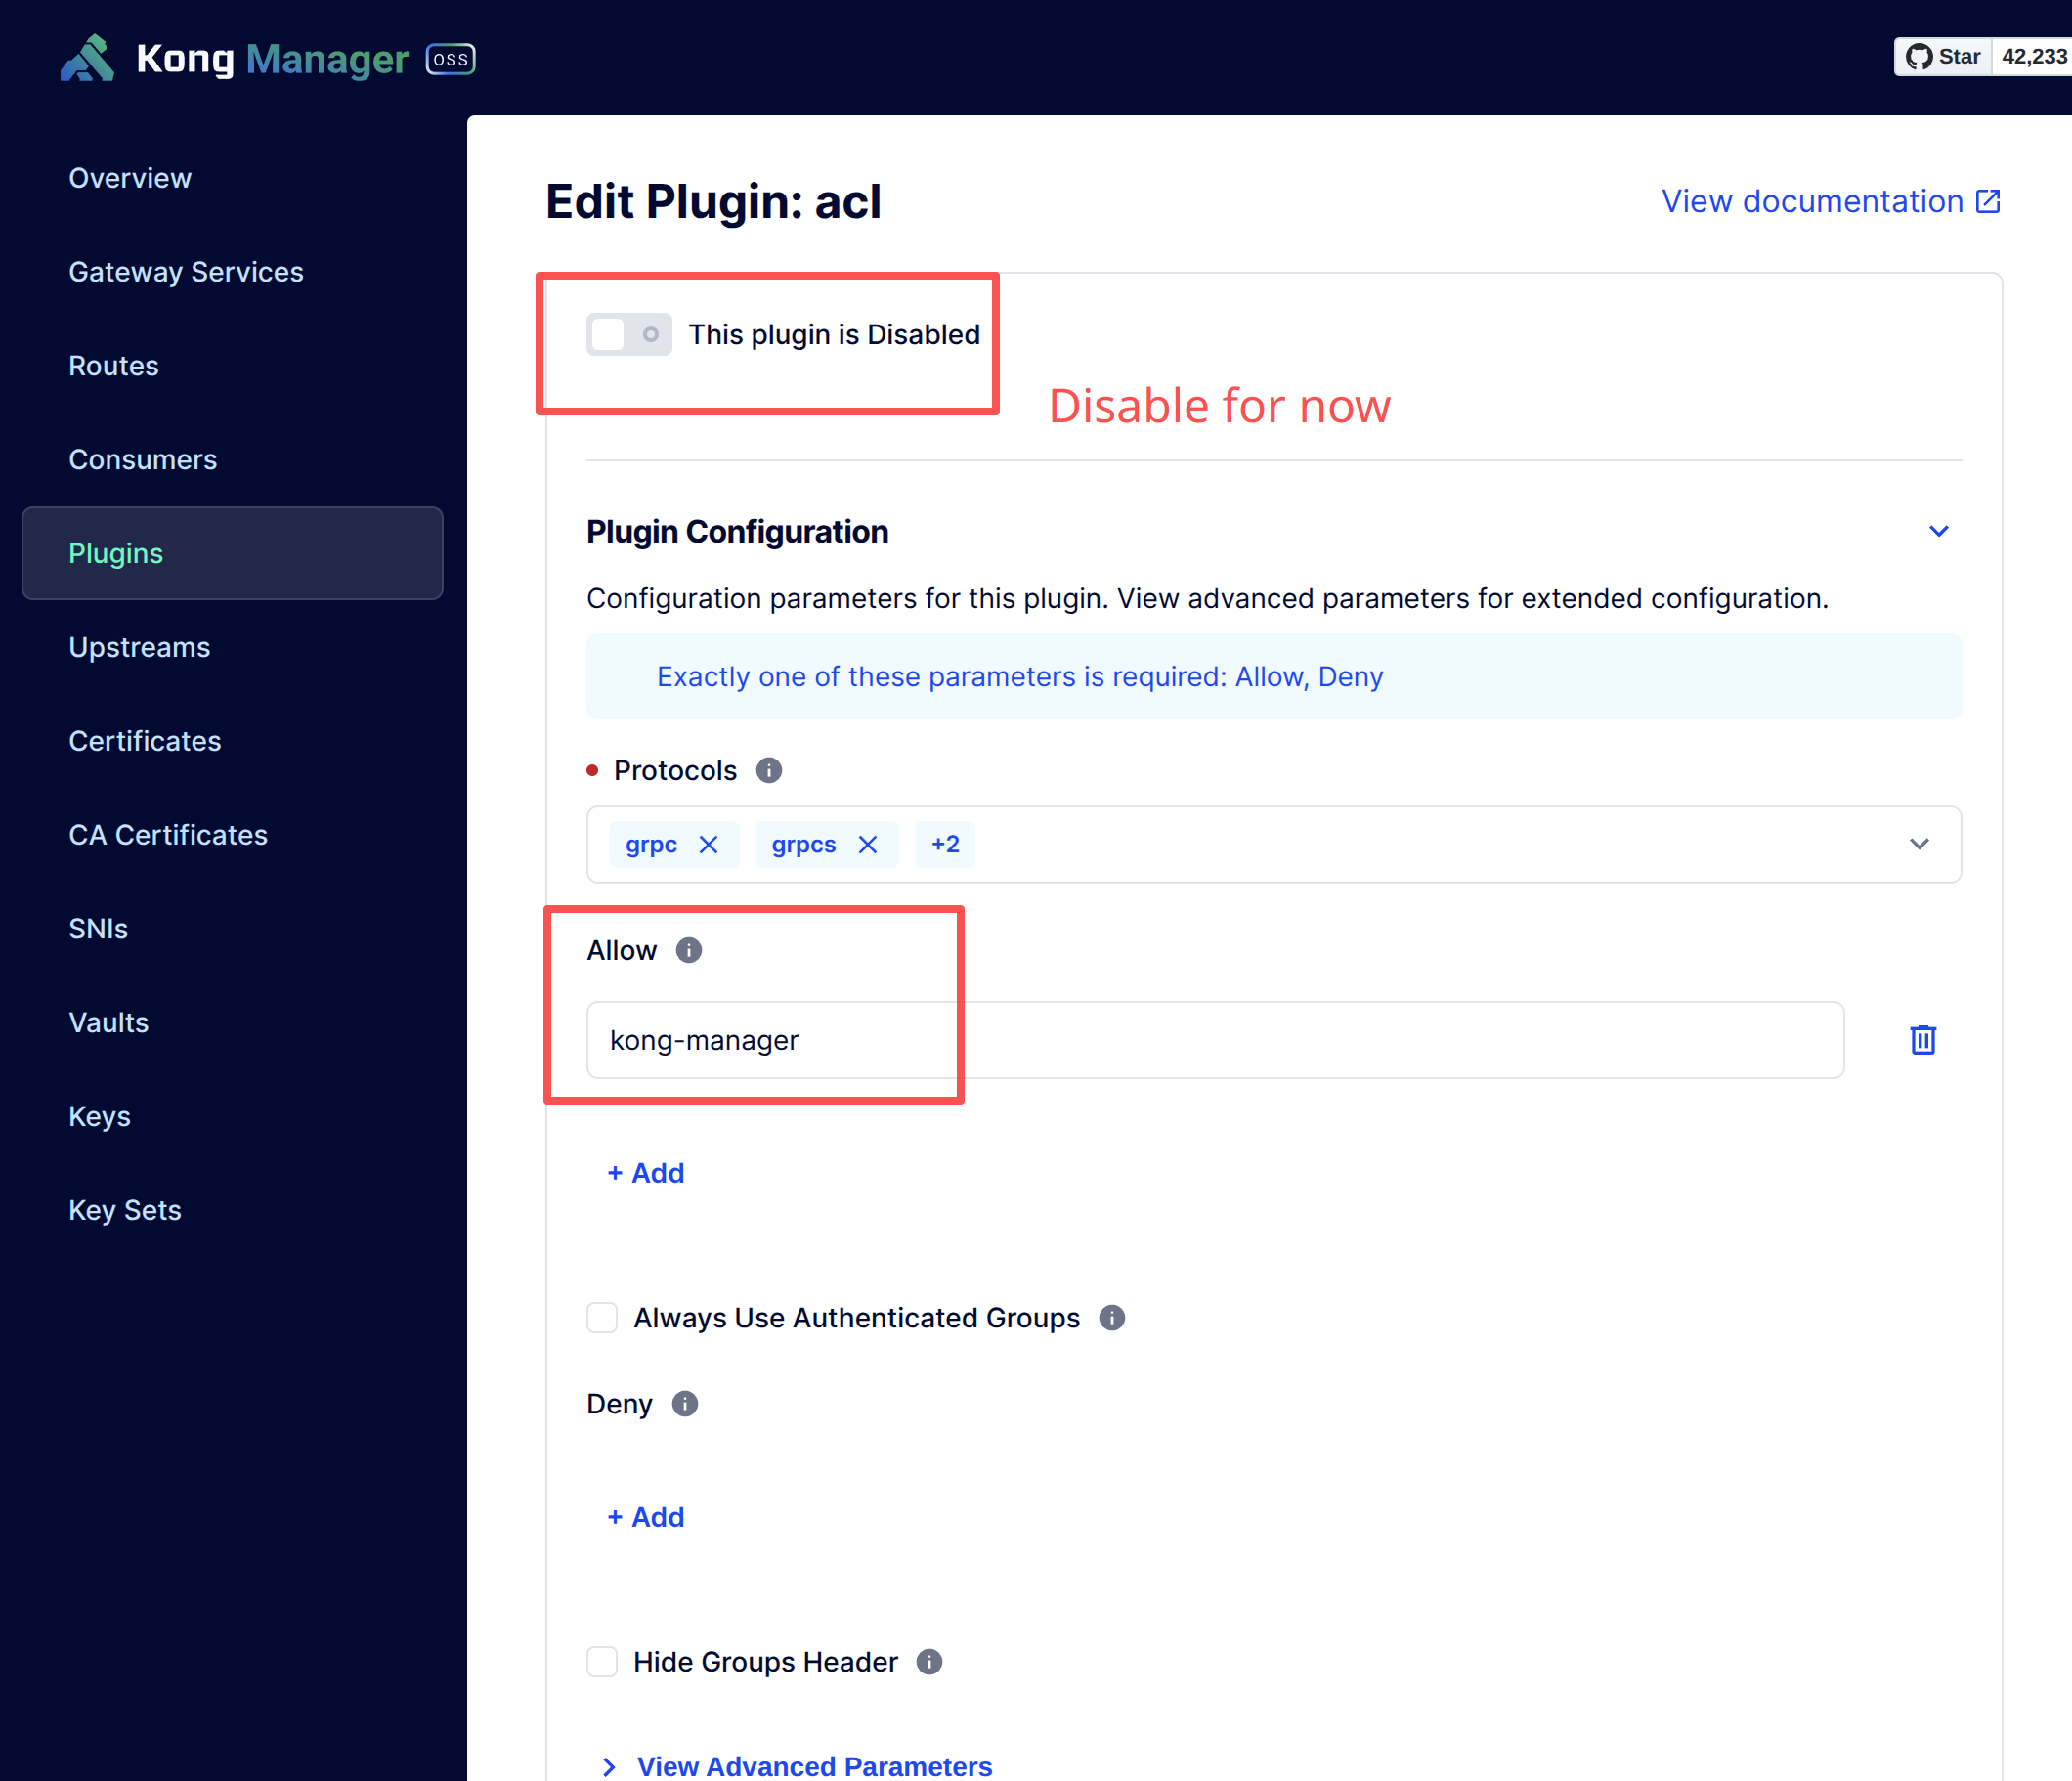
The ACL plugin’s Allow value here is the Group Name, which we will configure on the Consumer shortly.
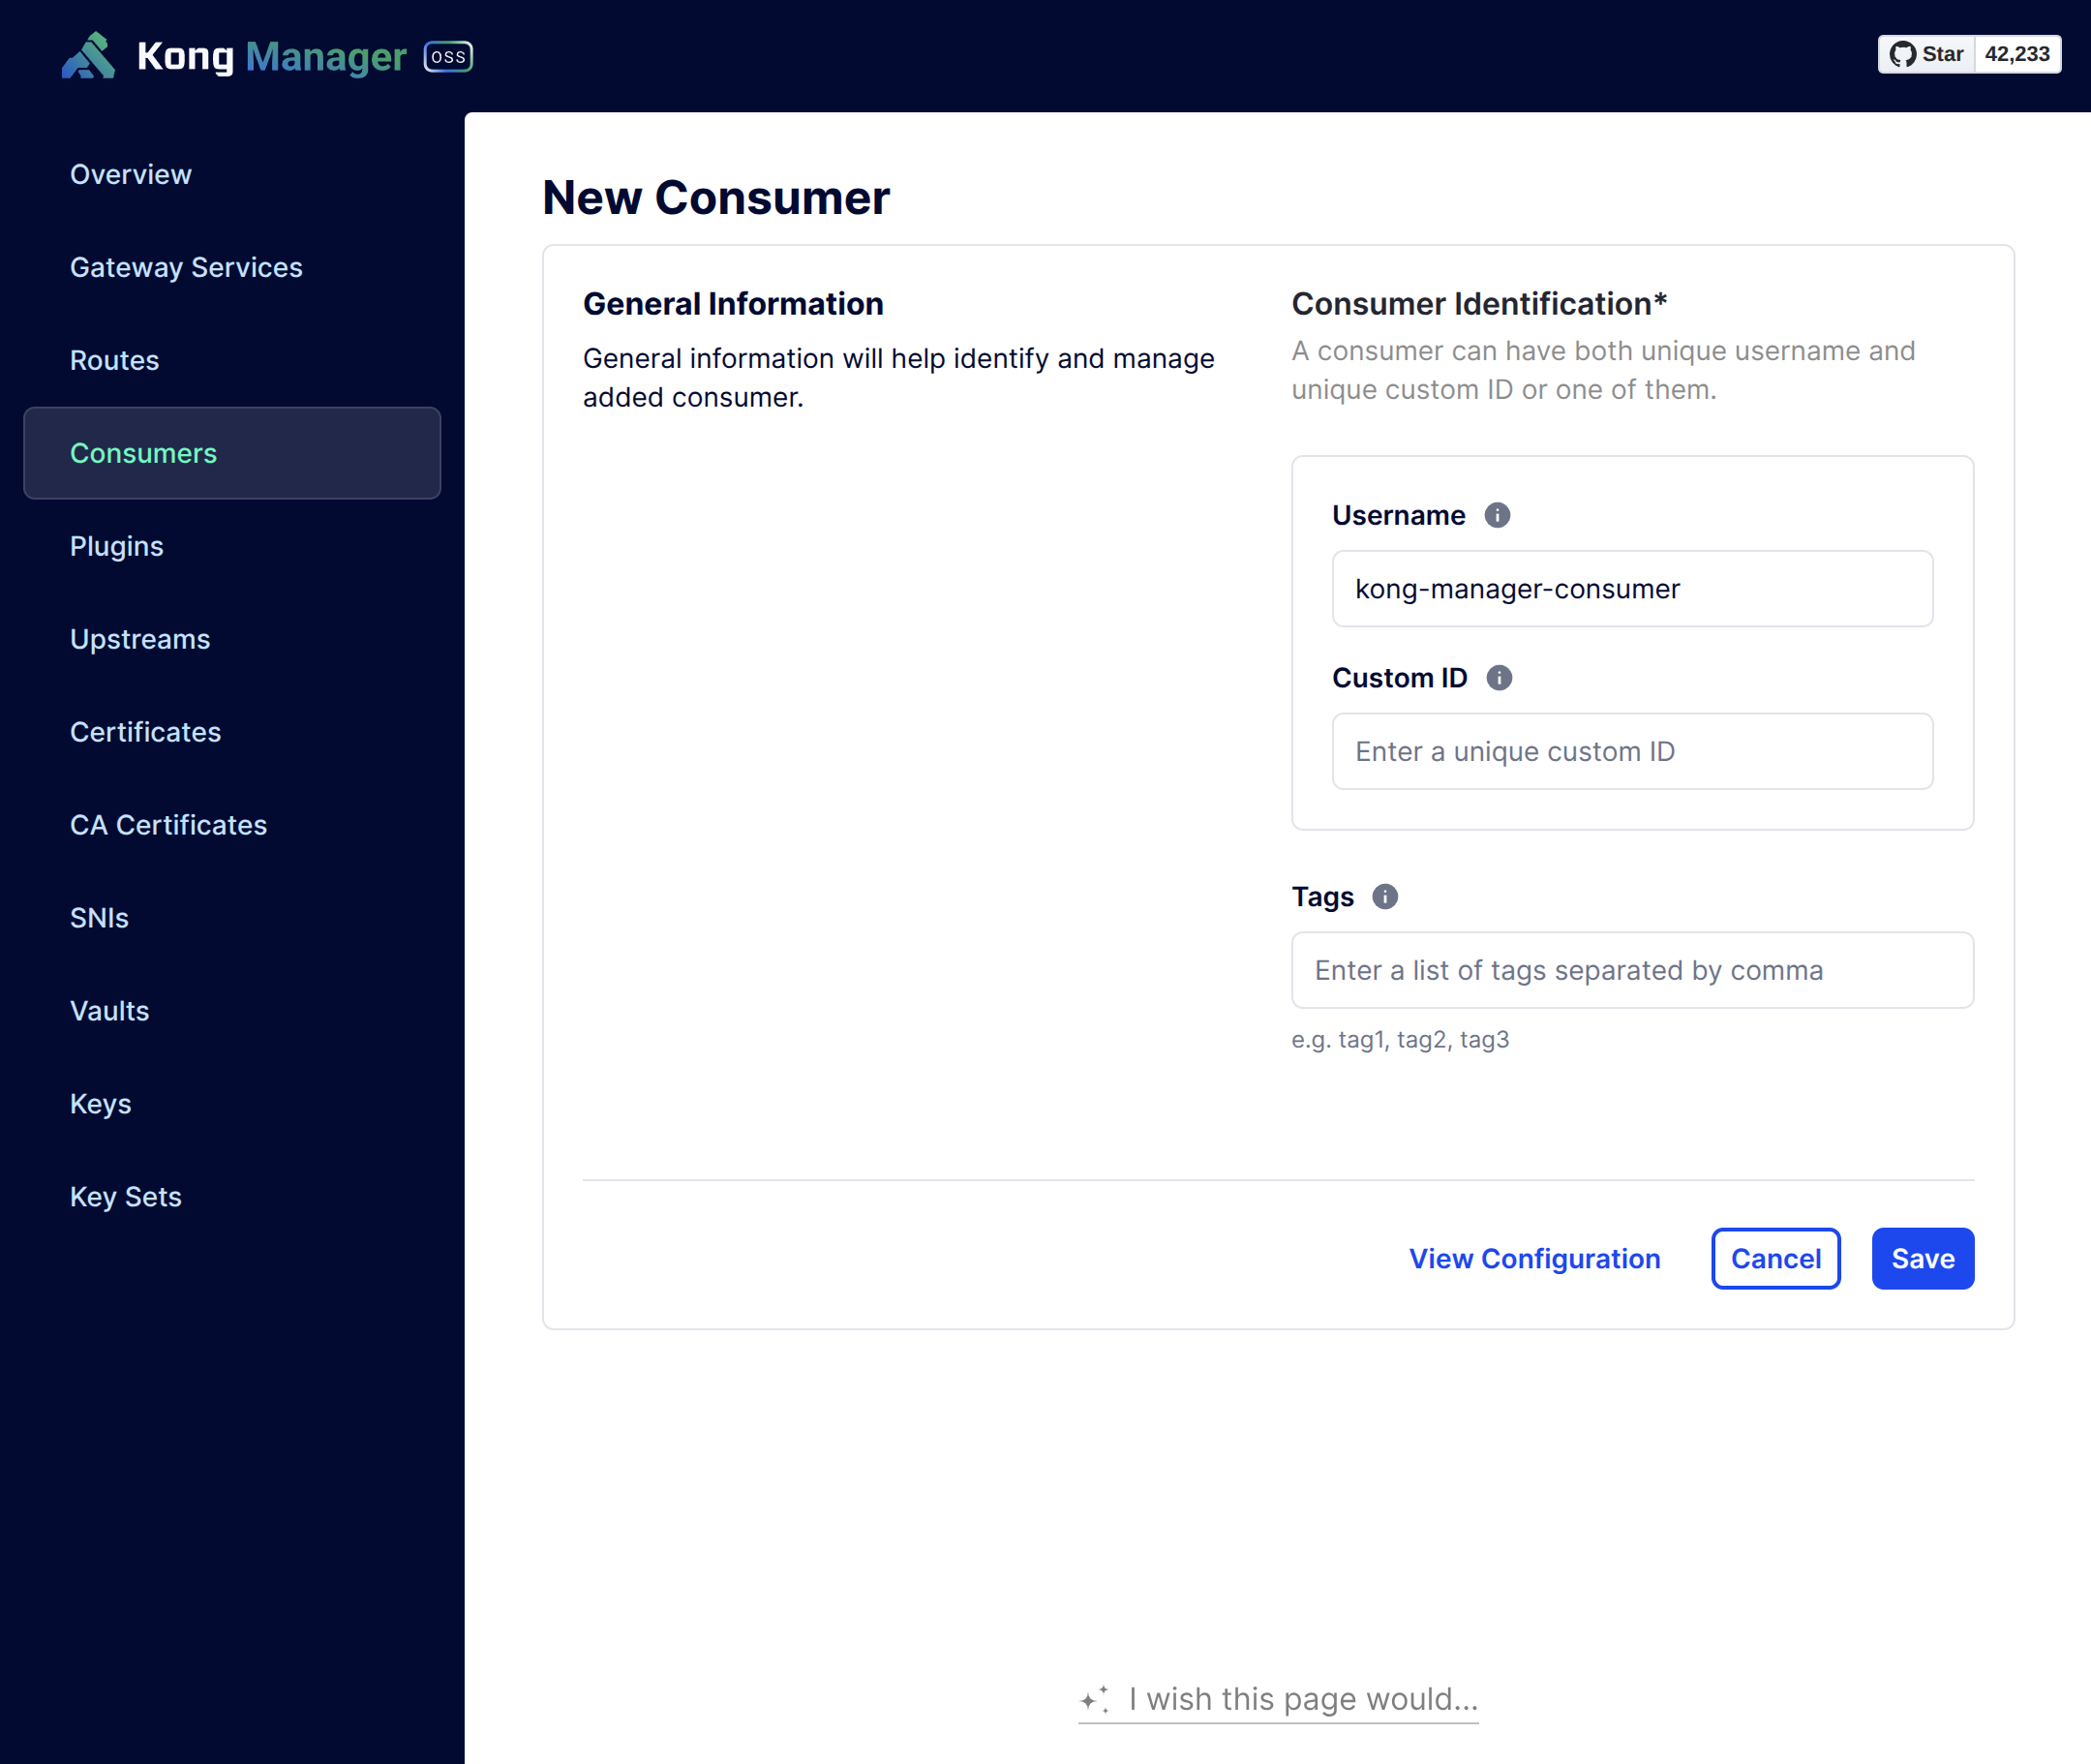
Configure the Kong Manager Consumer
We create a new Consumer dedicated to Kong Manager, giving Basic Auth authentication a separate, distinguishable identity.
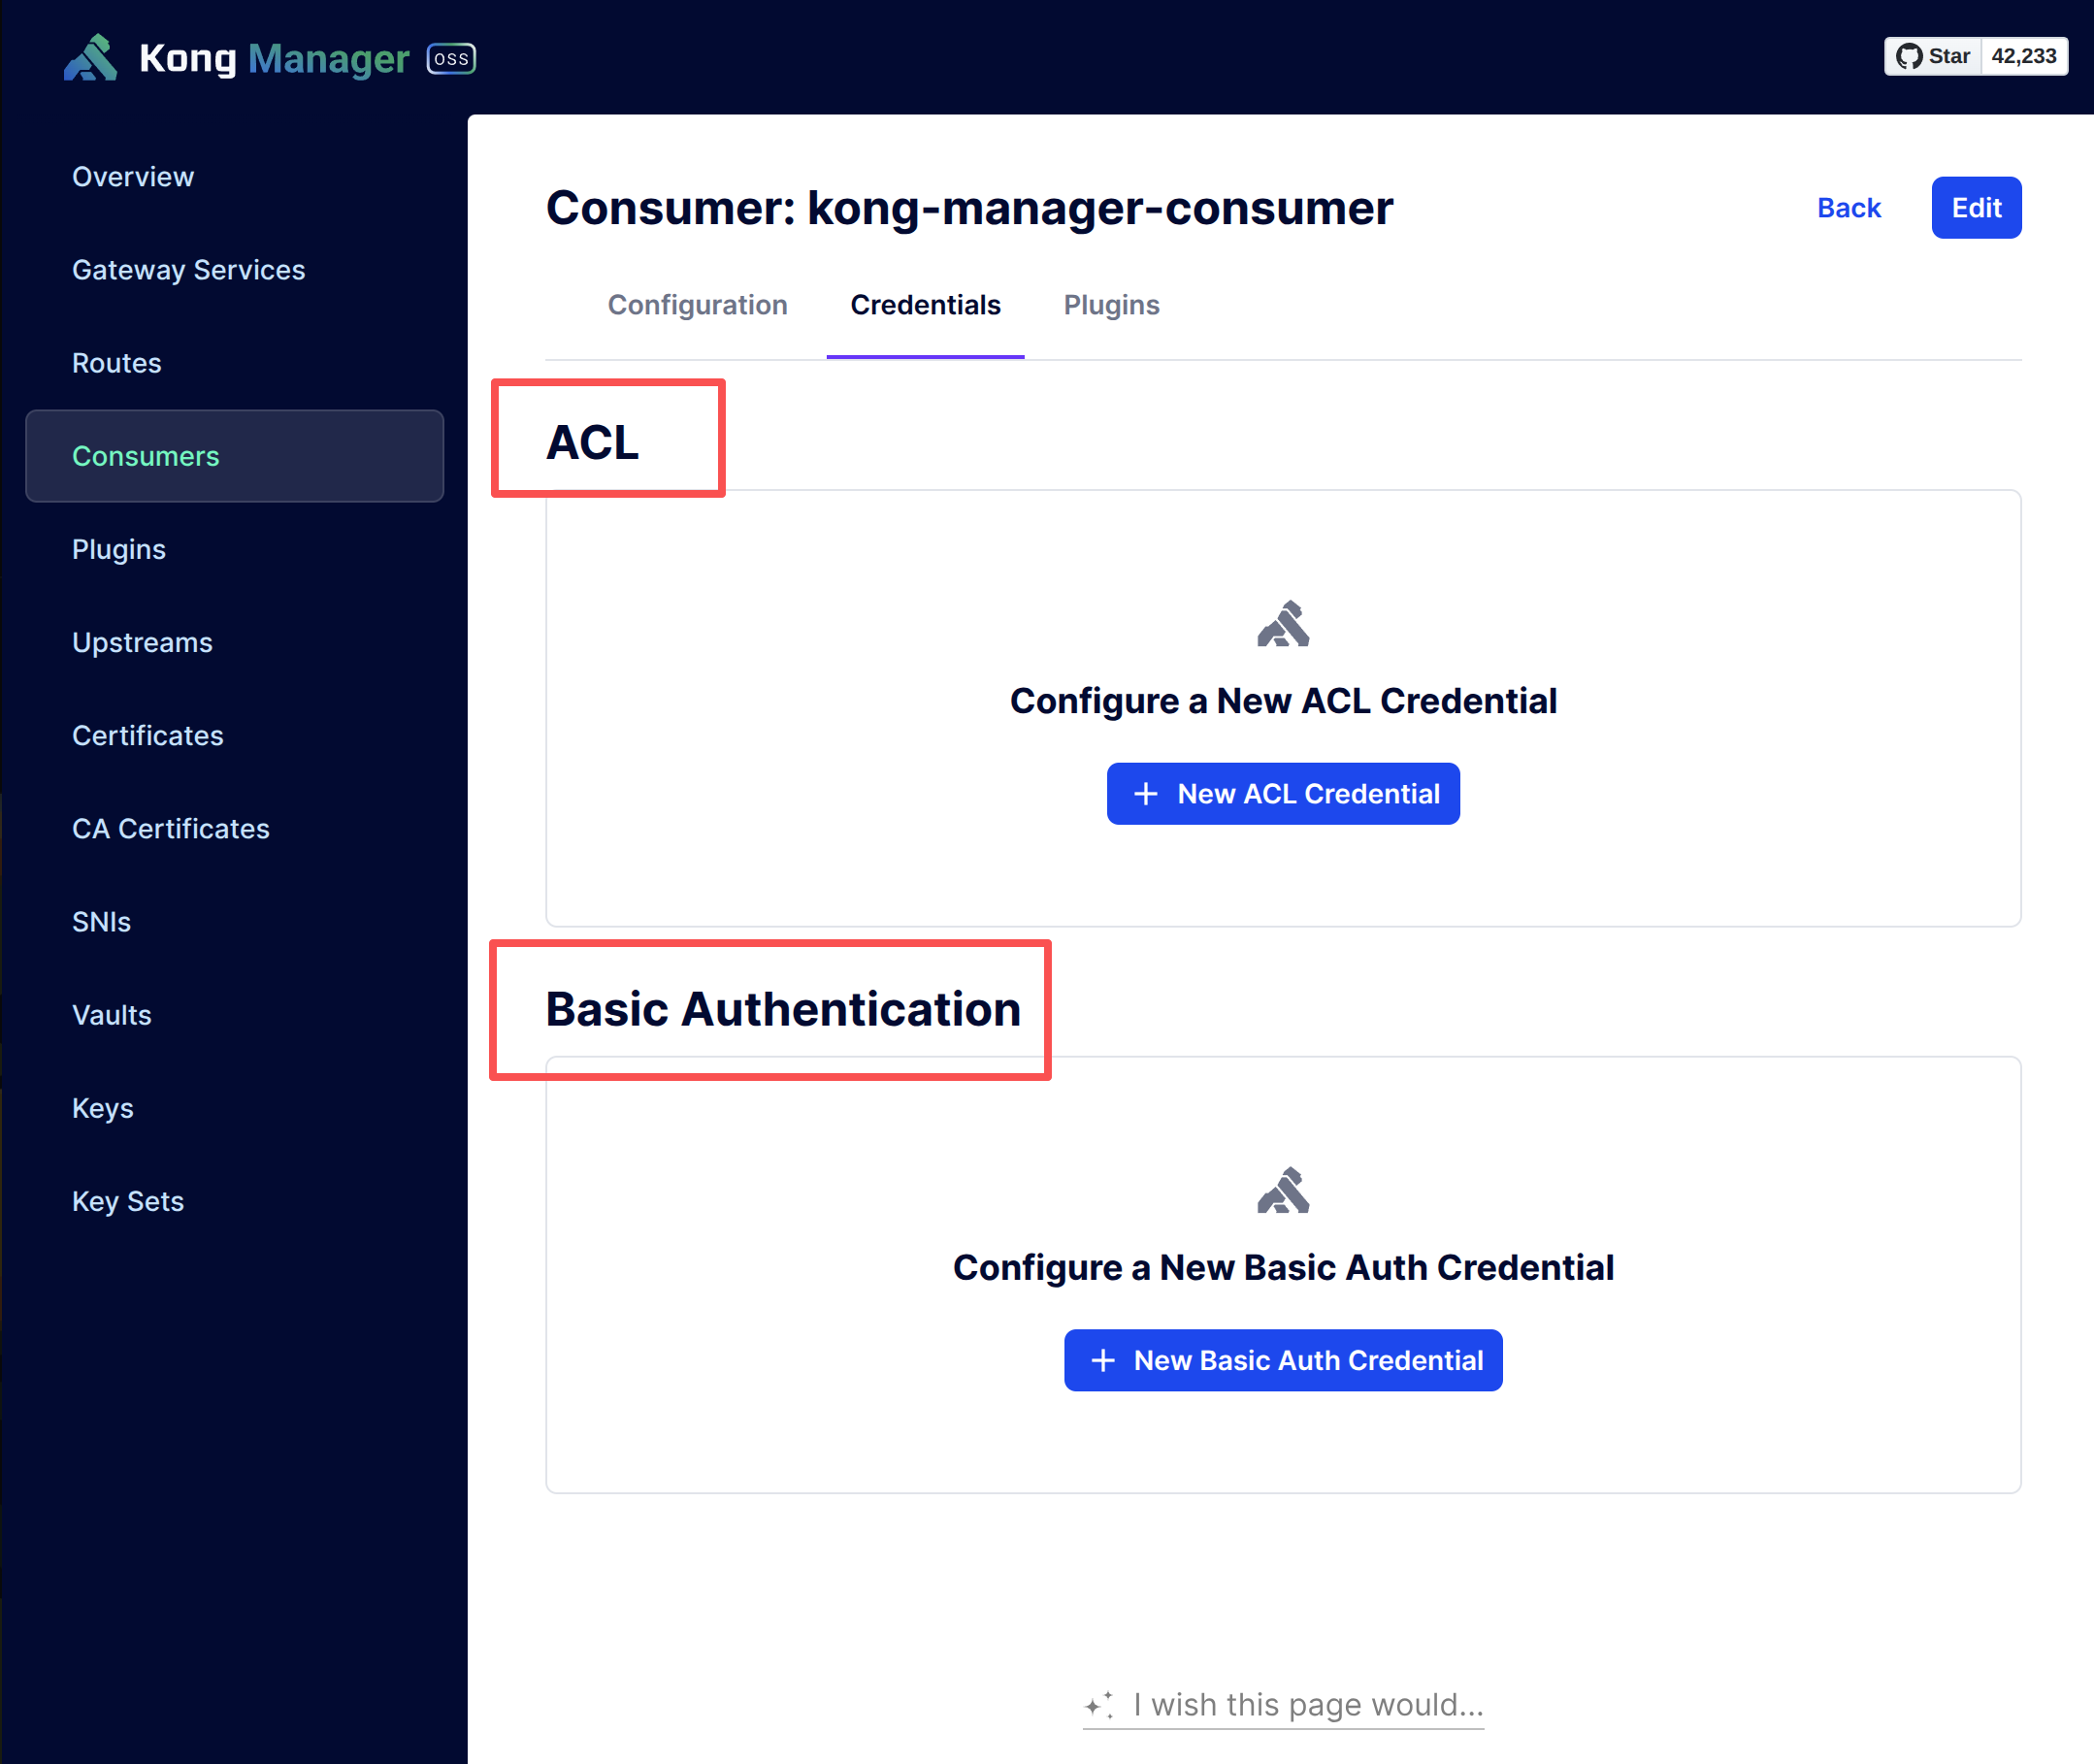
Then we add the actual credentials to this Consumer:
- Configure Basic Auth Credentials; these can only be configured when the Basic Auth plugin is enabled
- Configure ACL Credentials; these can only be configured when the ACL plugin is enabled
Configure the ACL Credentials:
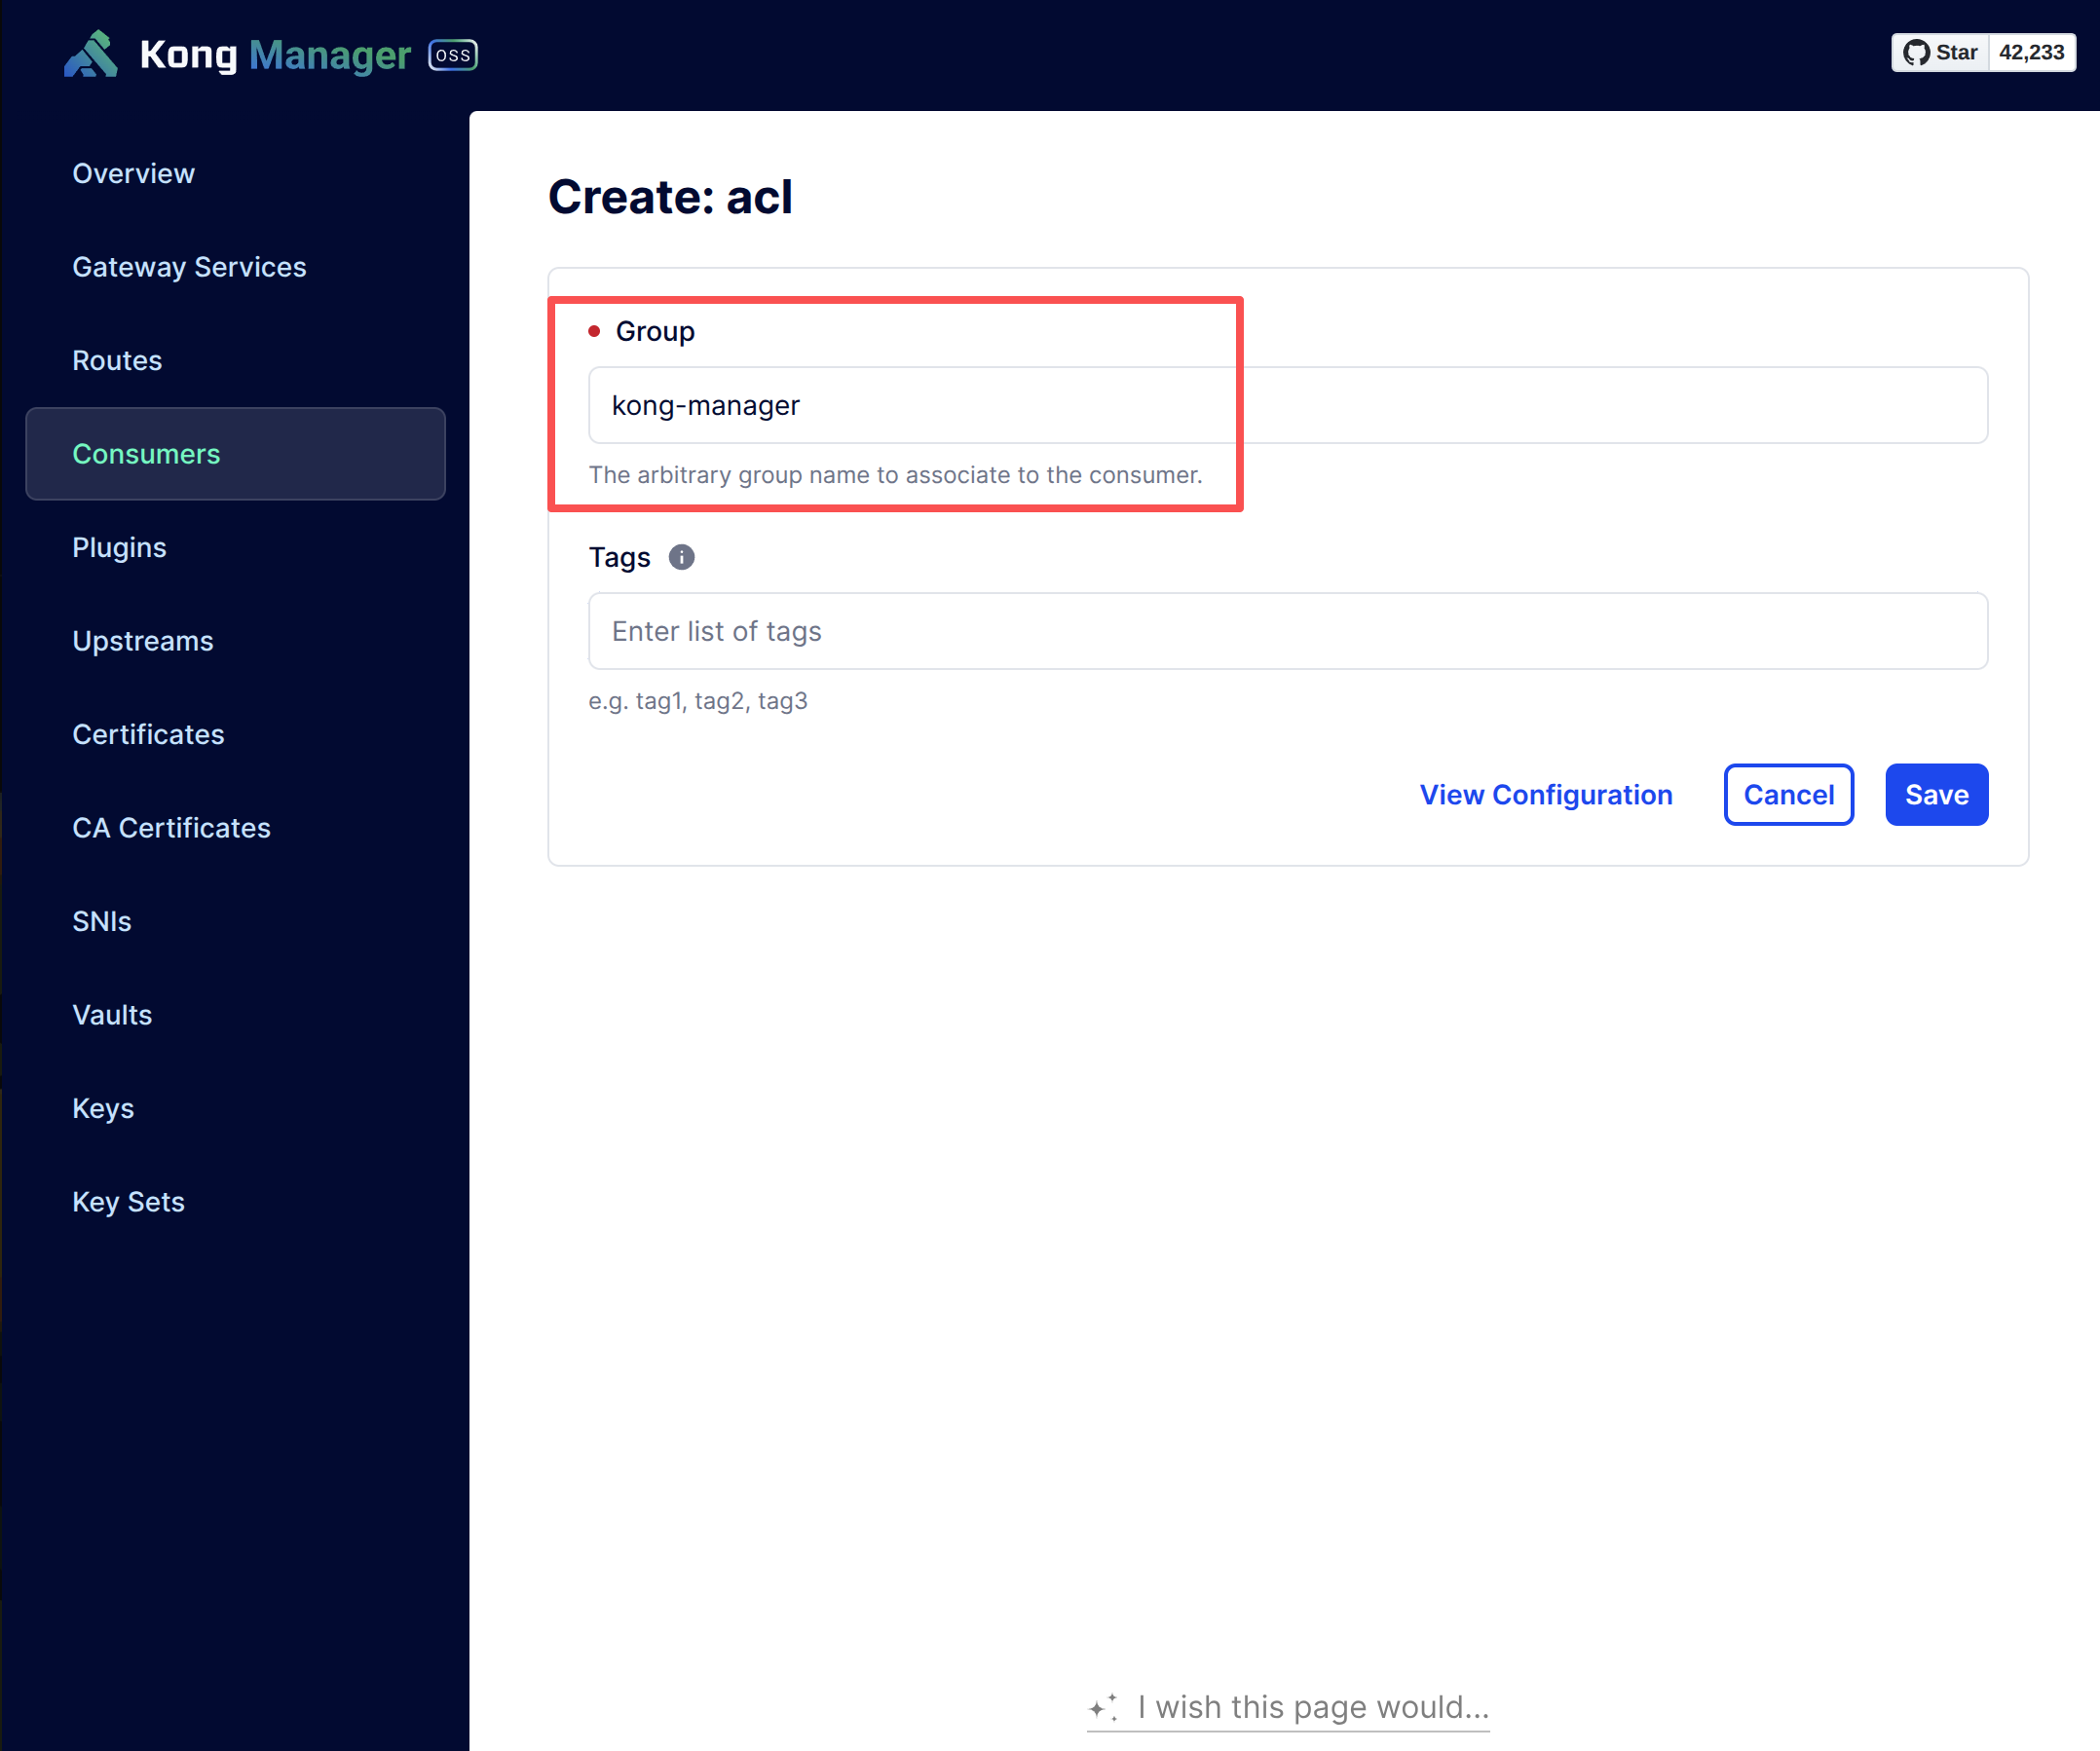
Note that the Group Name here must match the plugin.
Configure the Basic Auth Credentials:
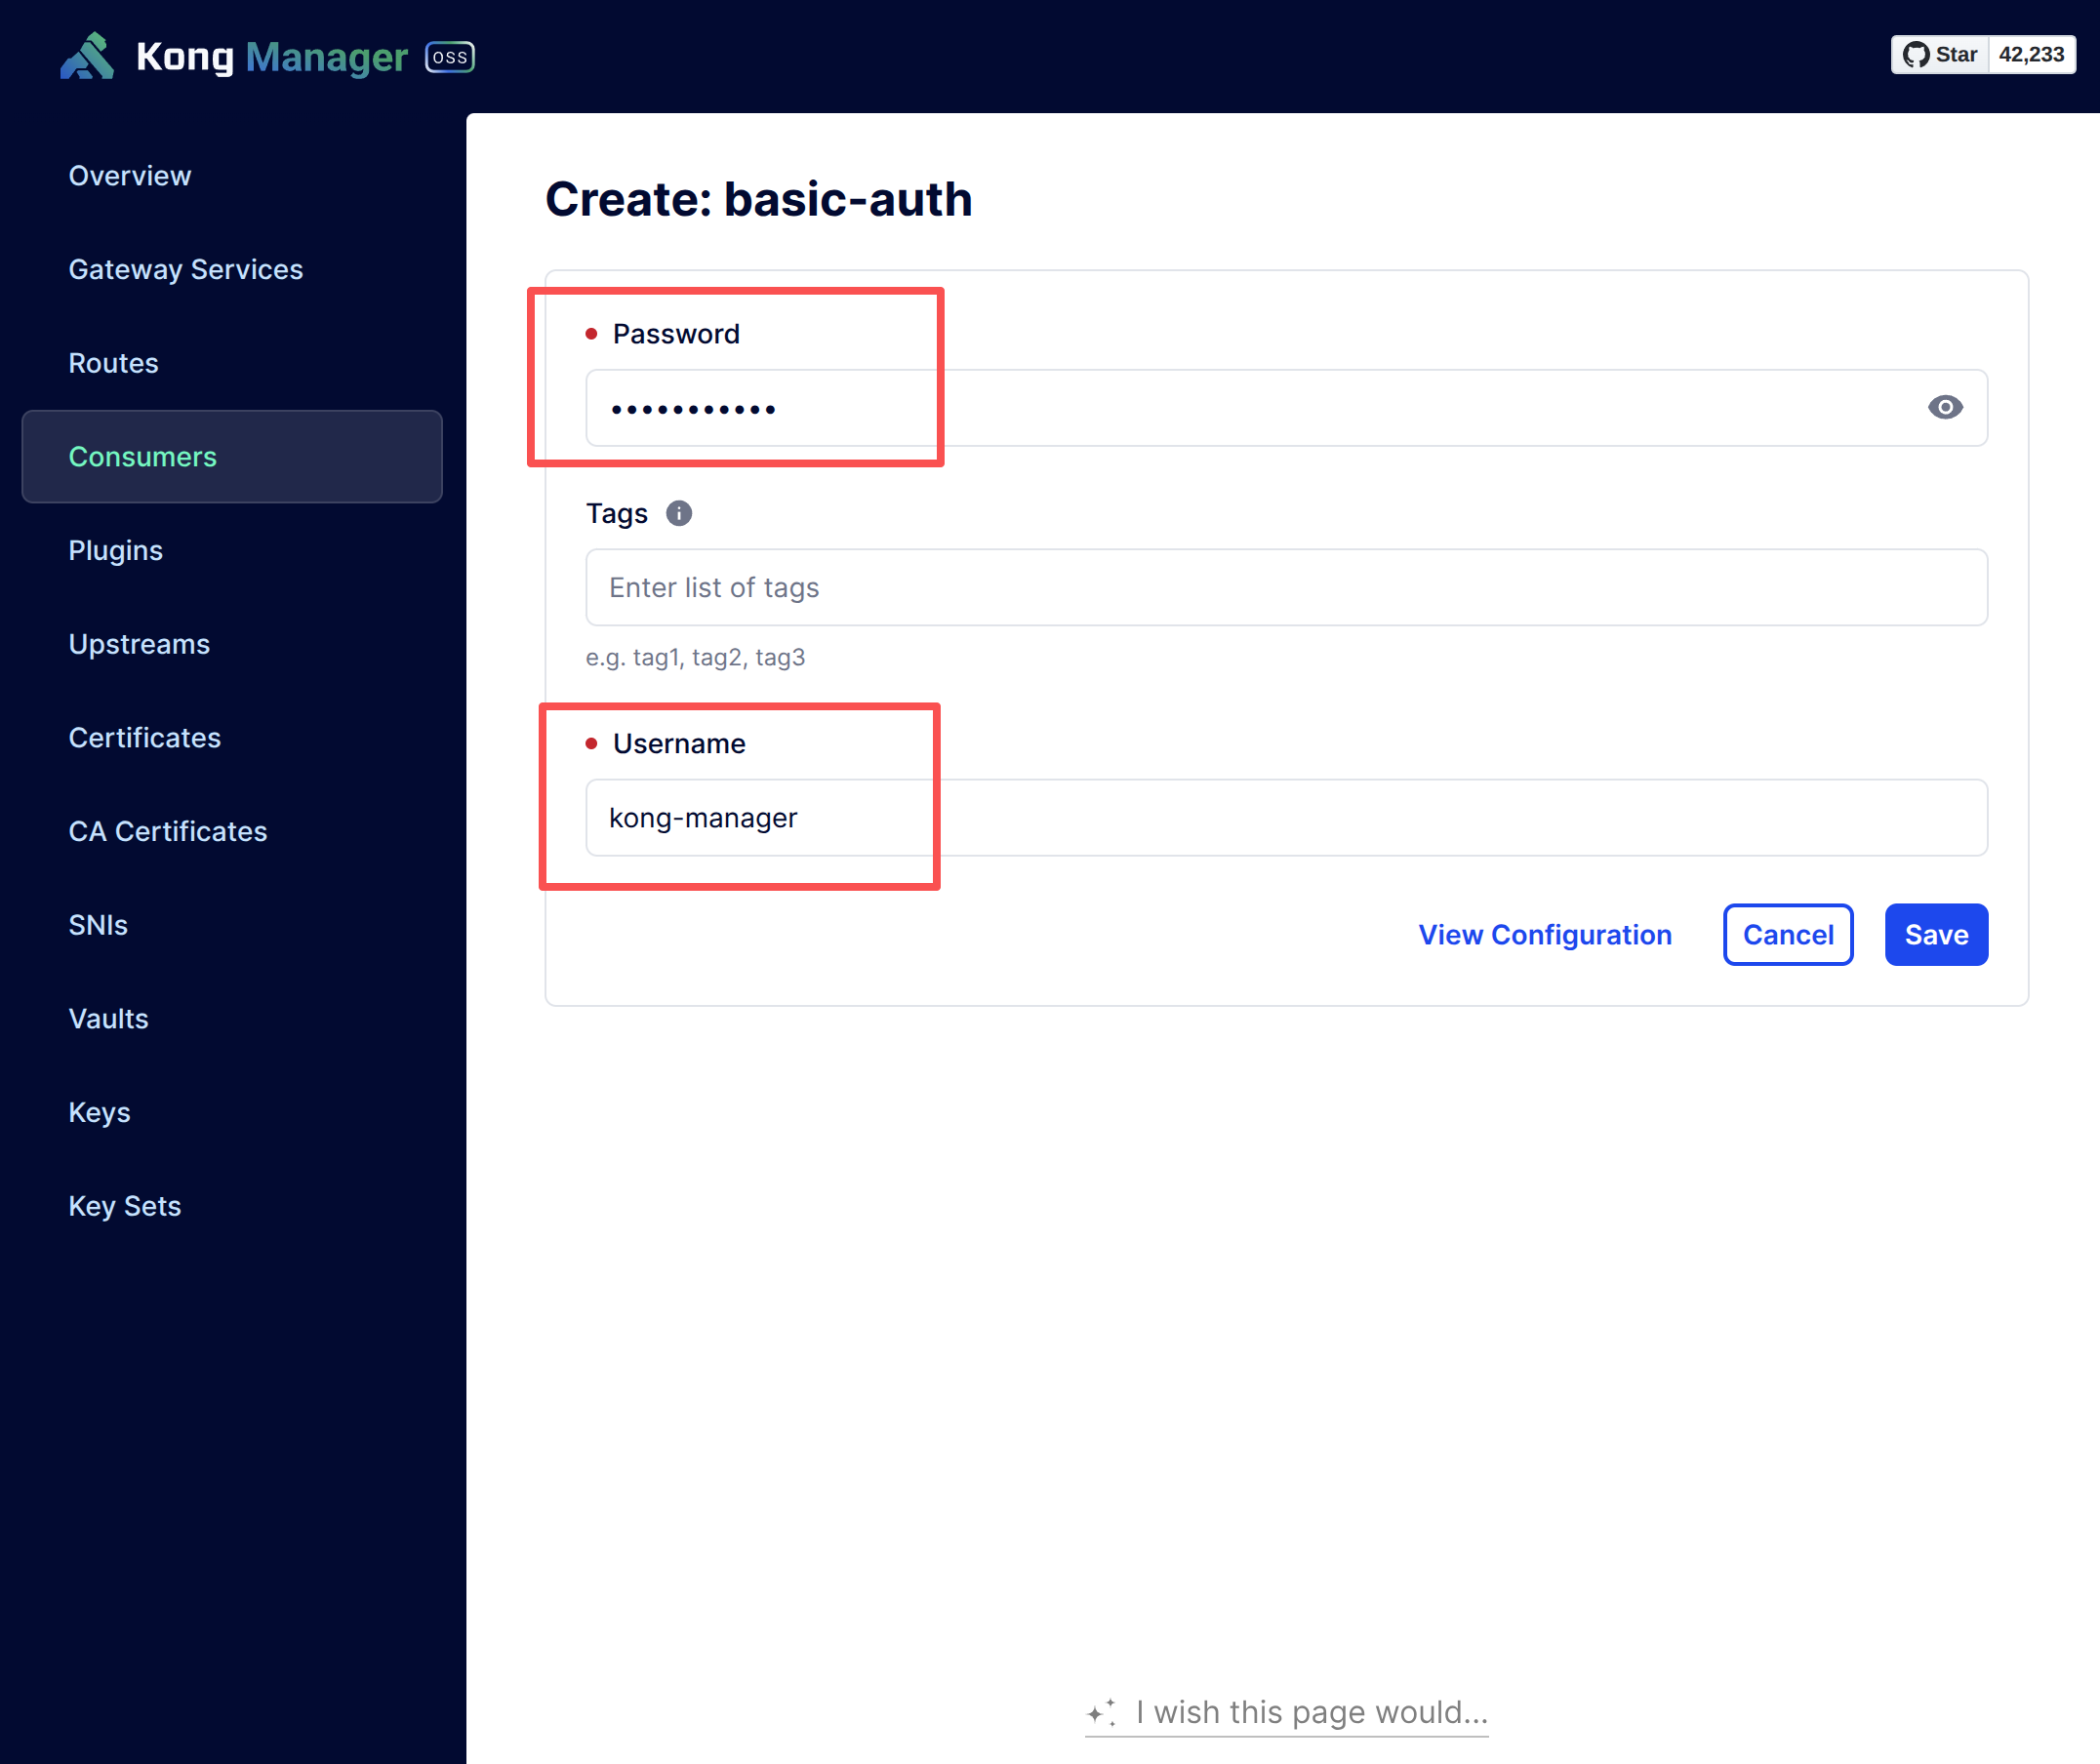
Set Username & Password to whatever you like, as long as it stays secure.
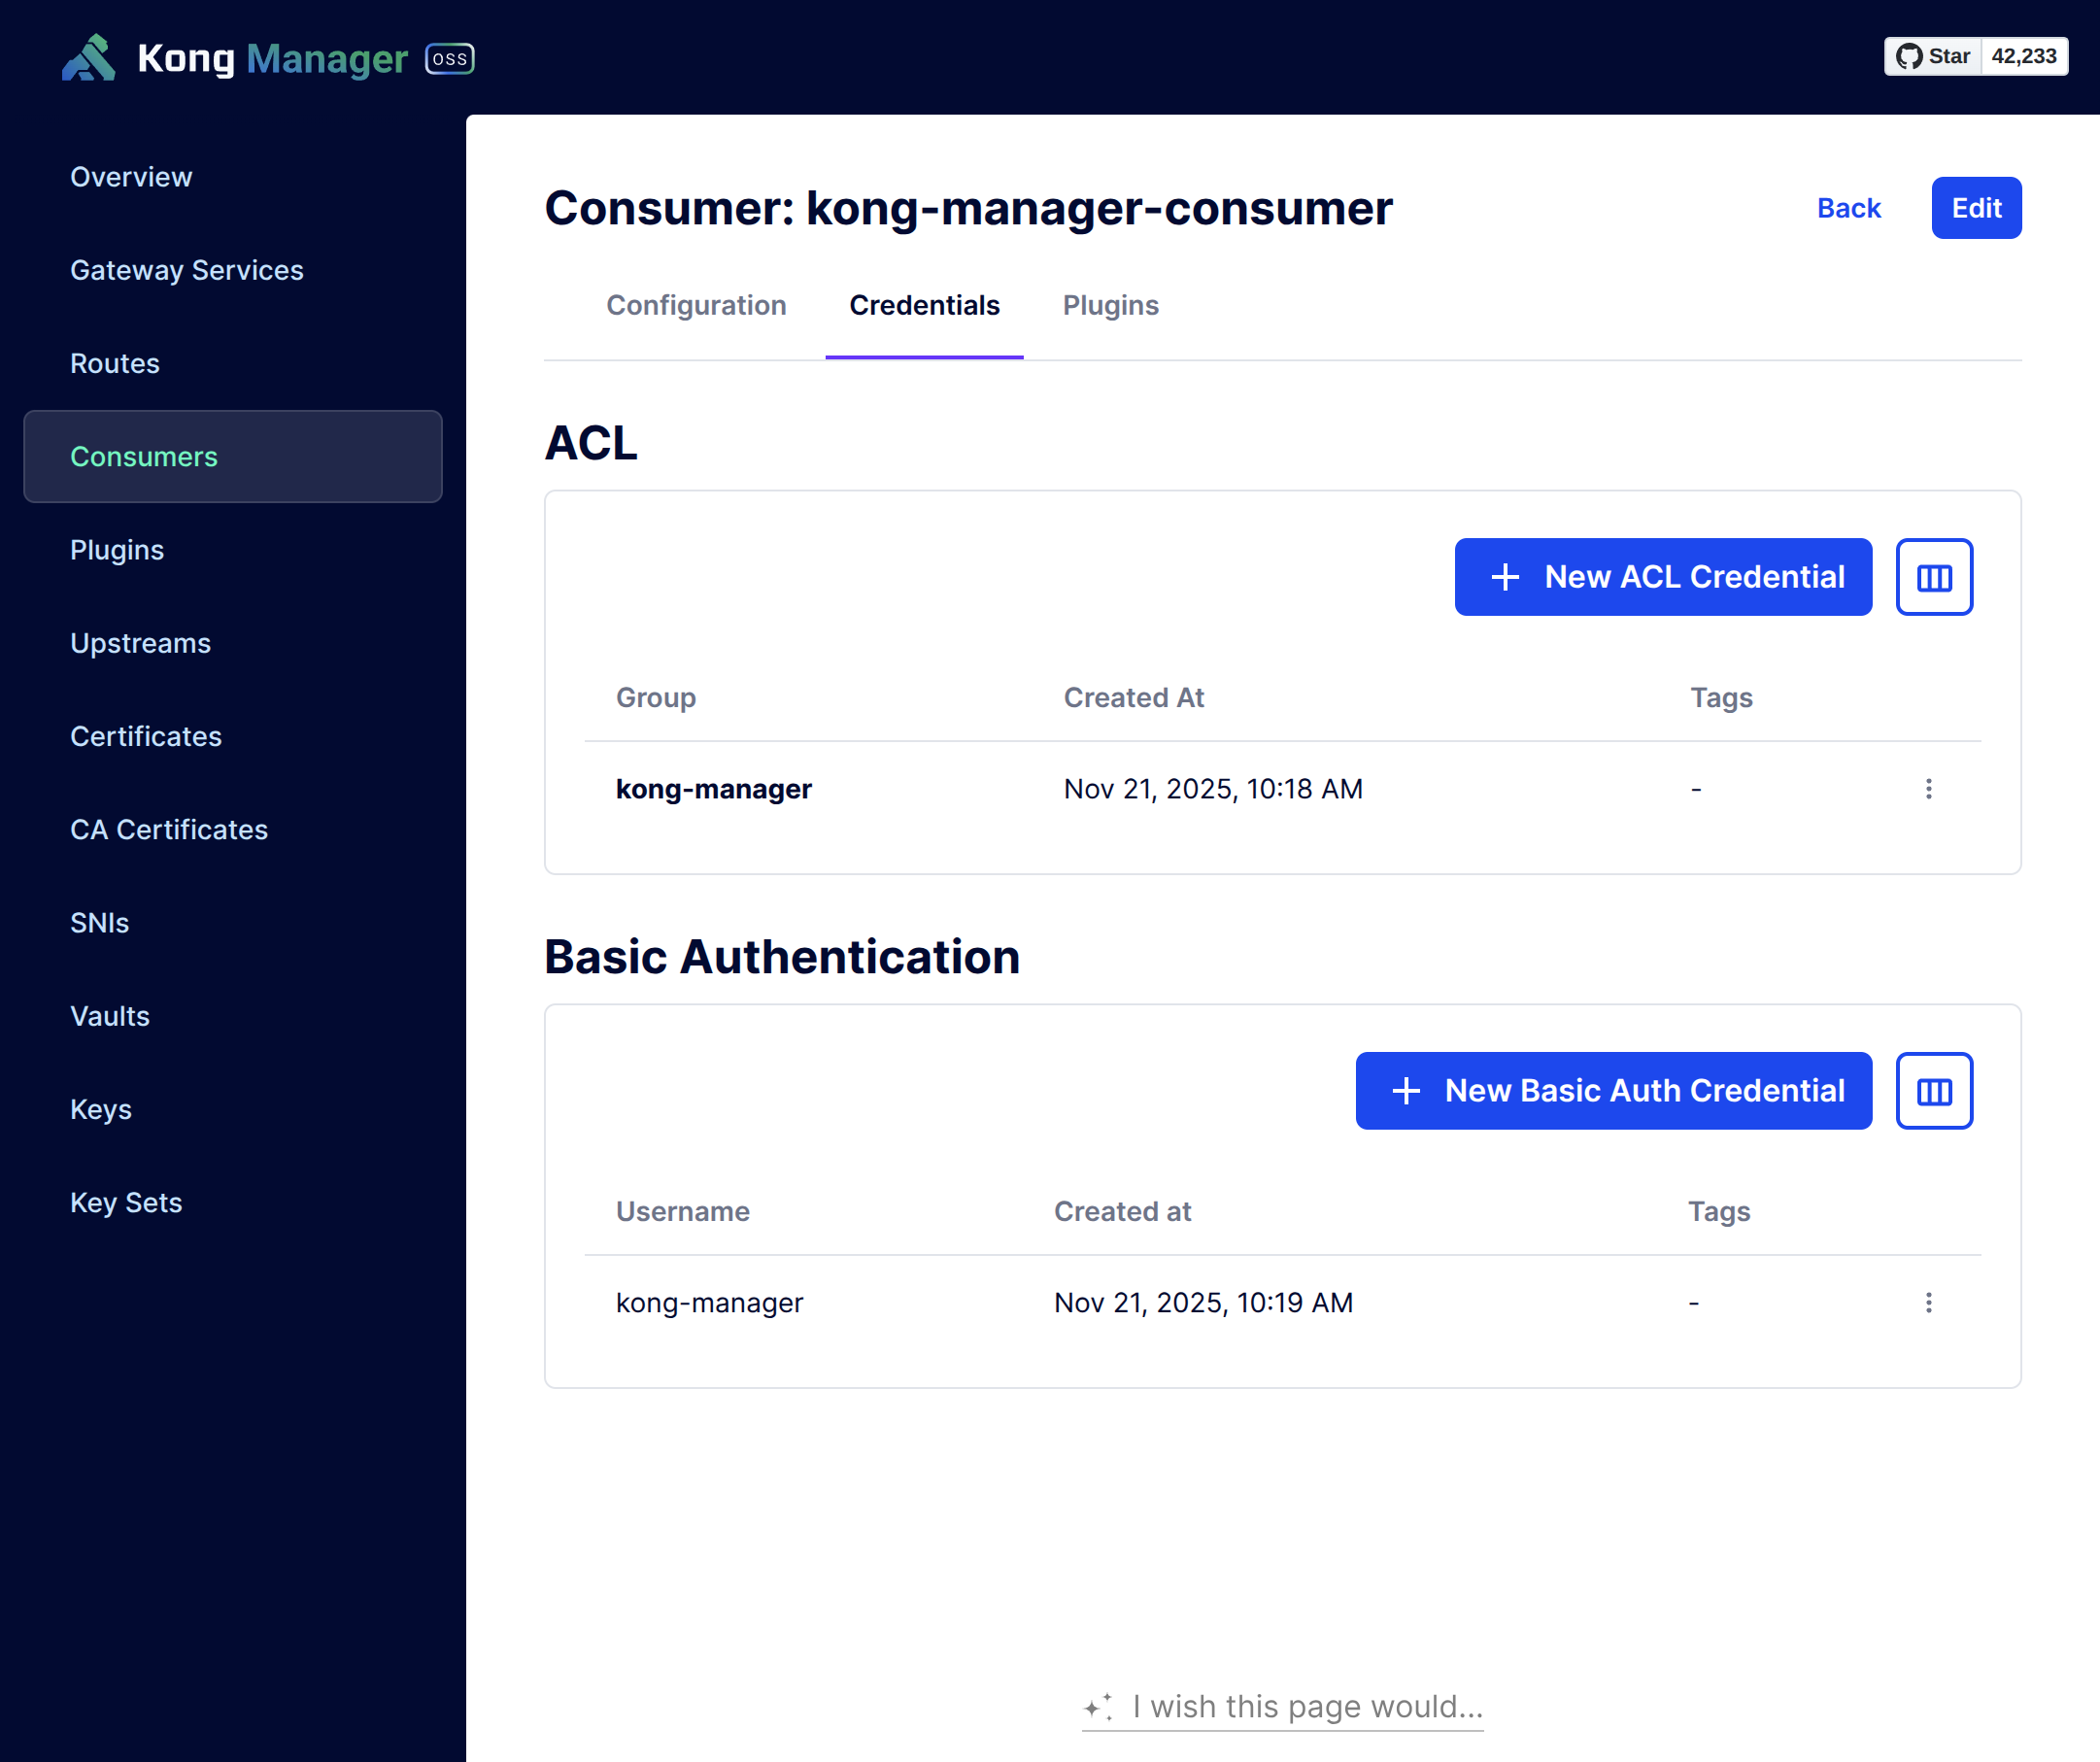
After configuring the Consumer Credentials, the list looks like this:
Enable the plugins on the services
Just enable the plugins, for both the Kong Manager & Kong Admin services.
Redeploy Kong Gateway
All configuration is now updated. Redeploy Kong Gateway so that the environment variables take effect.
Visit in a browser: https://kong.yourdomain.com/kong-manager
The Basic Auth login form will pop up:
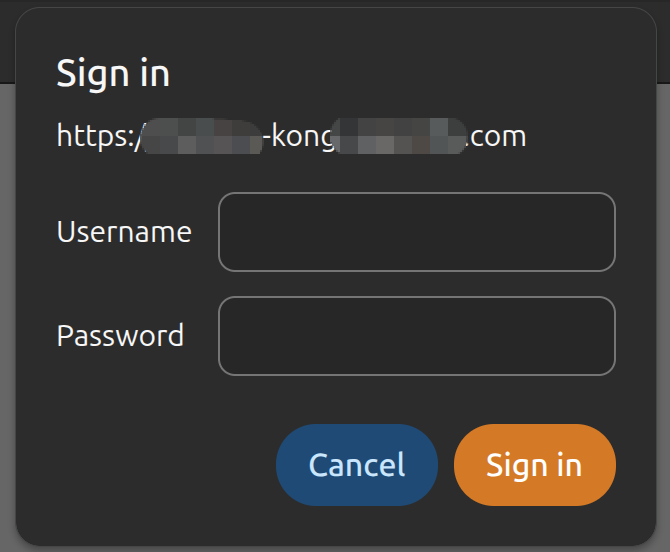
Enter the Username & Password you set earlier to get into the Kong Manager UI.